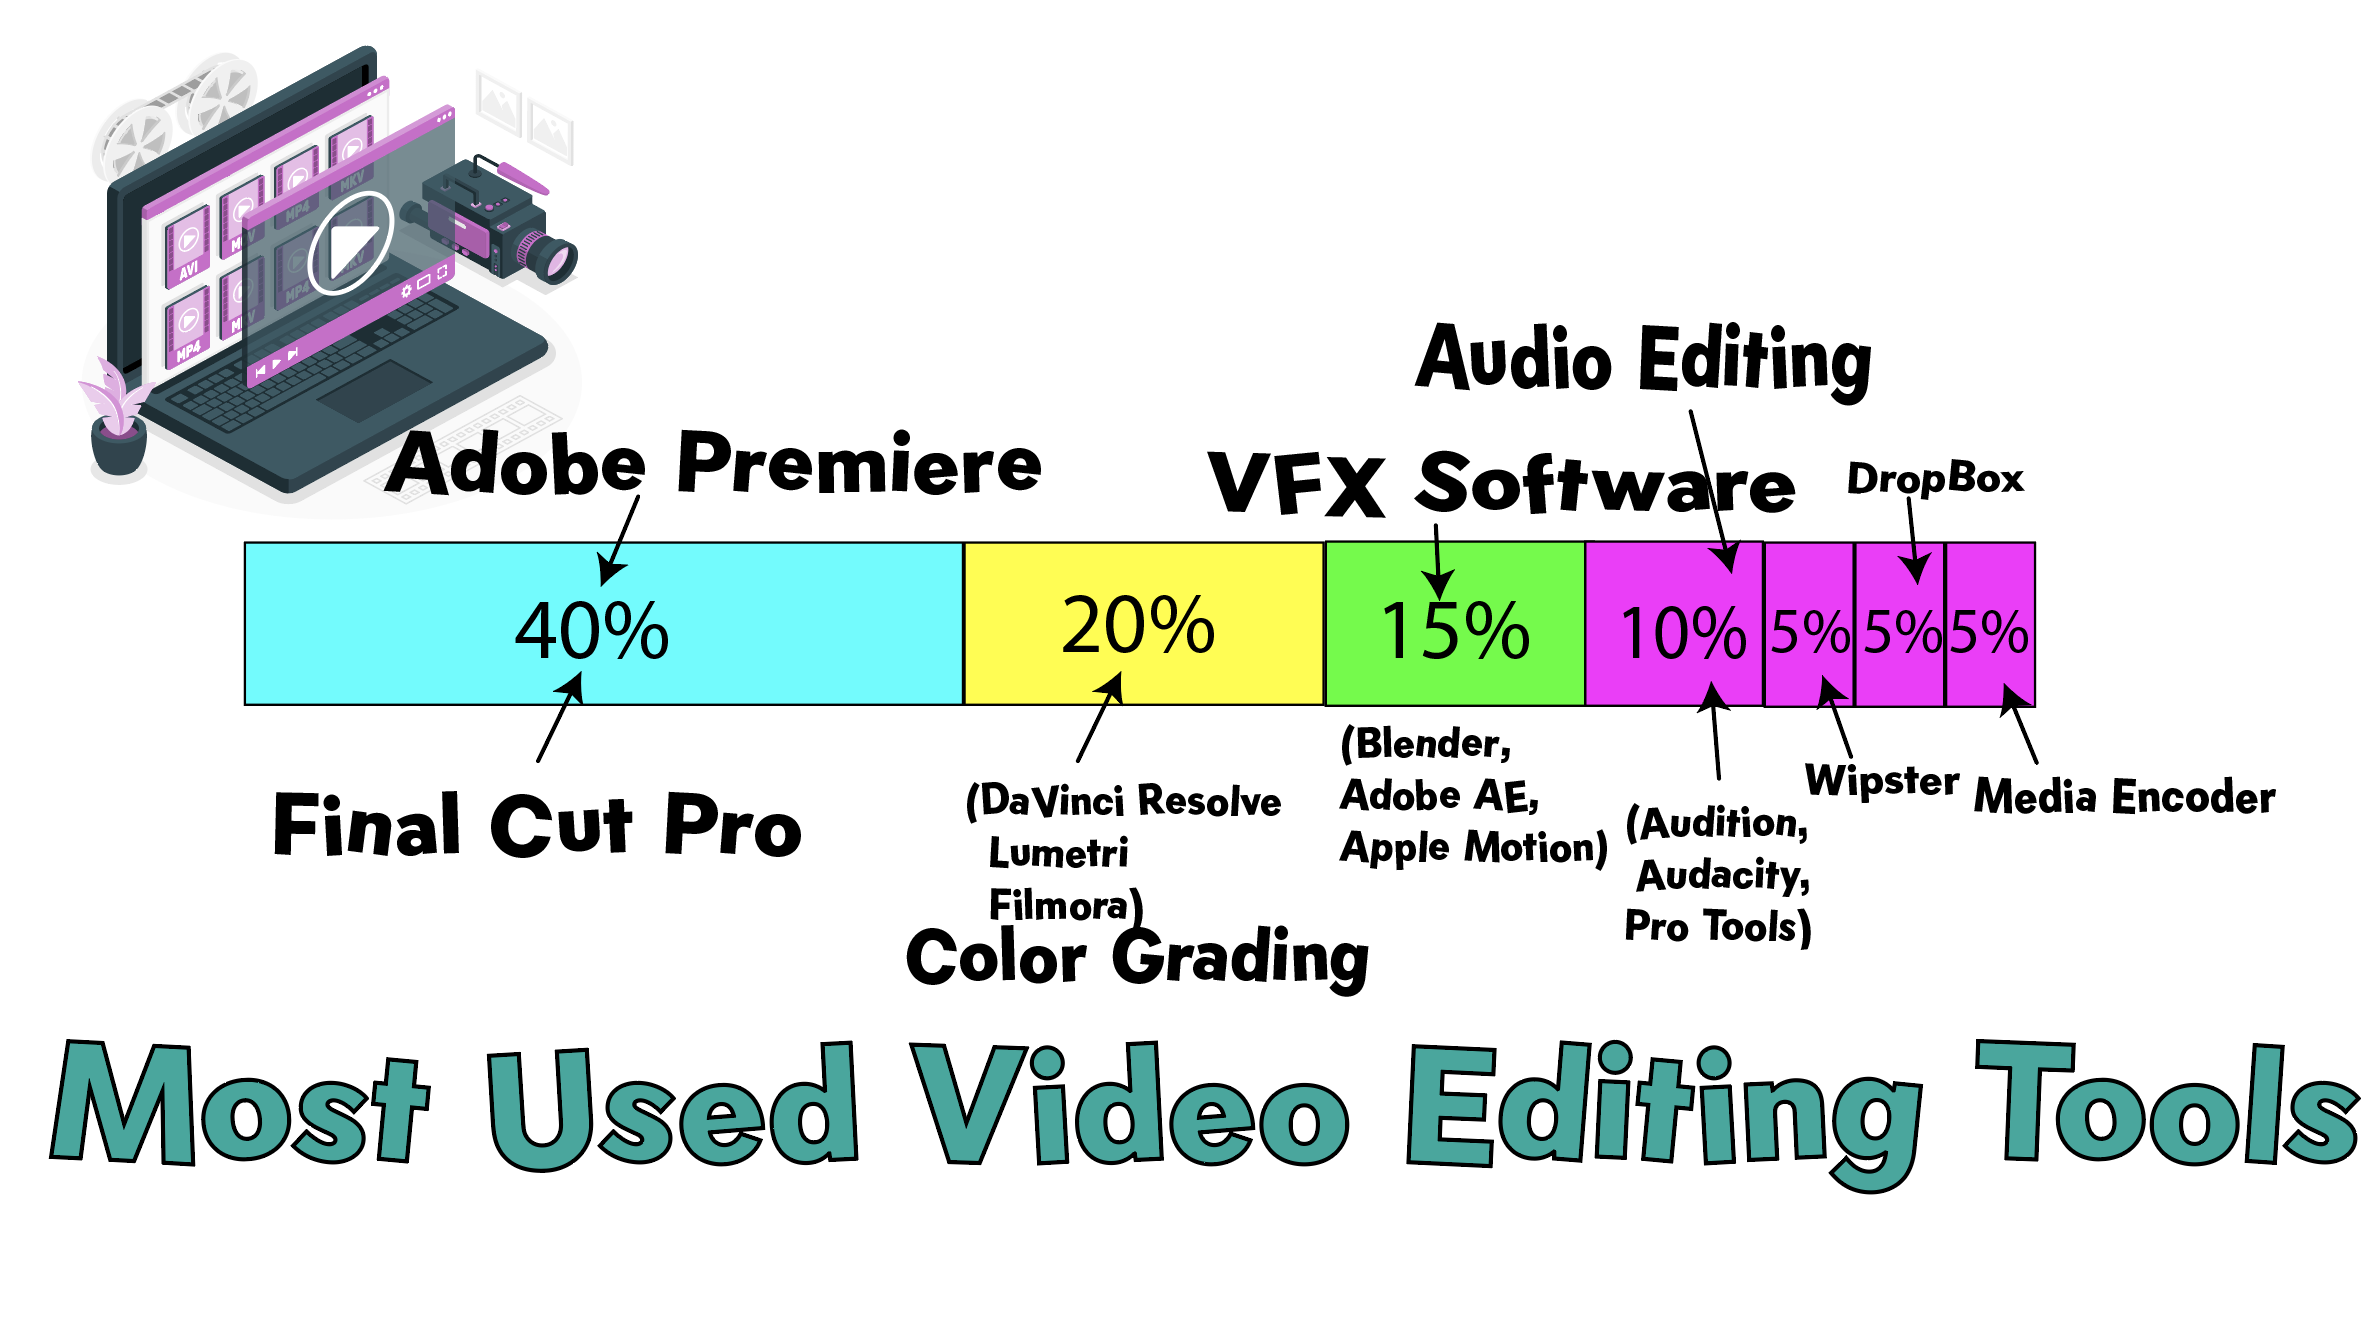
The 7 Essential Tools & Software For Video Editors
Though you don’t need to master every software on this list, if you want to be a sought-after video editor, these are the software you need to master. We’ll start with the most obvious one and add some tips (Your video editing software), the software after will make all the diference for efficiency and high quality work.
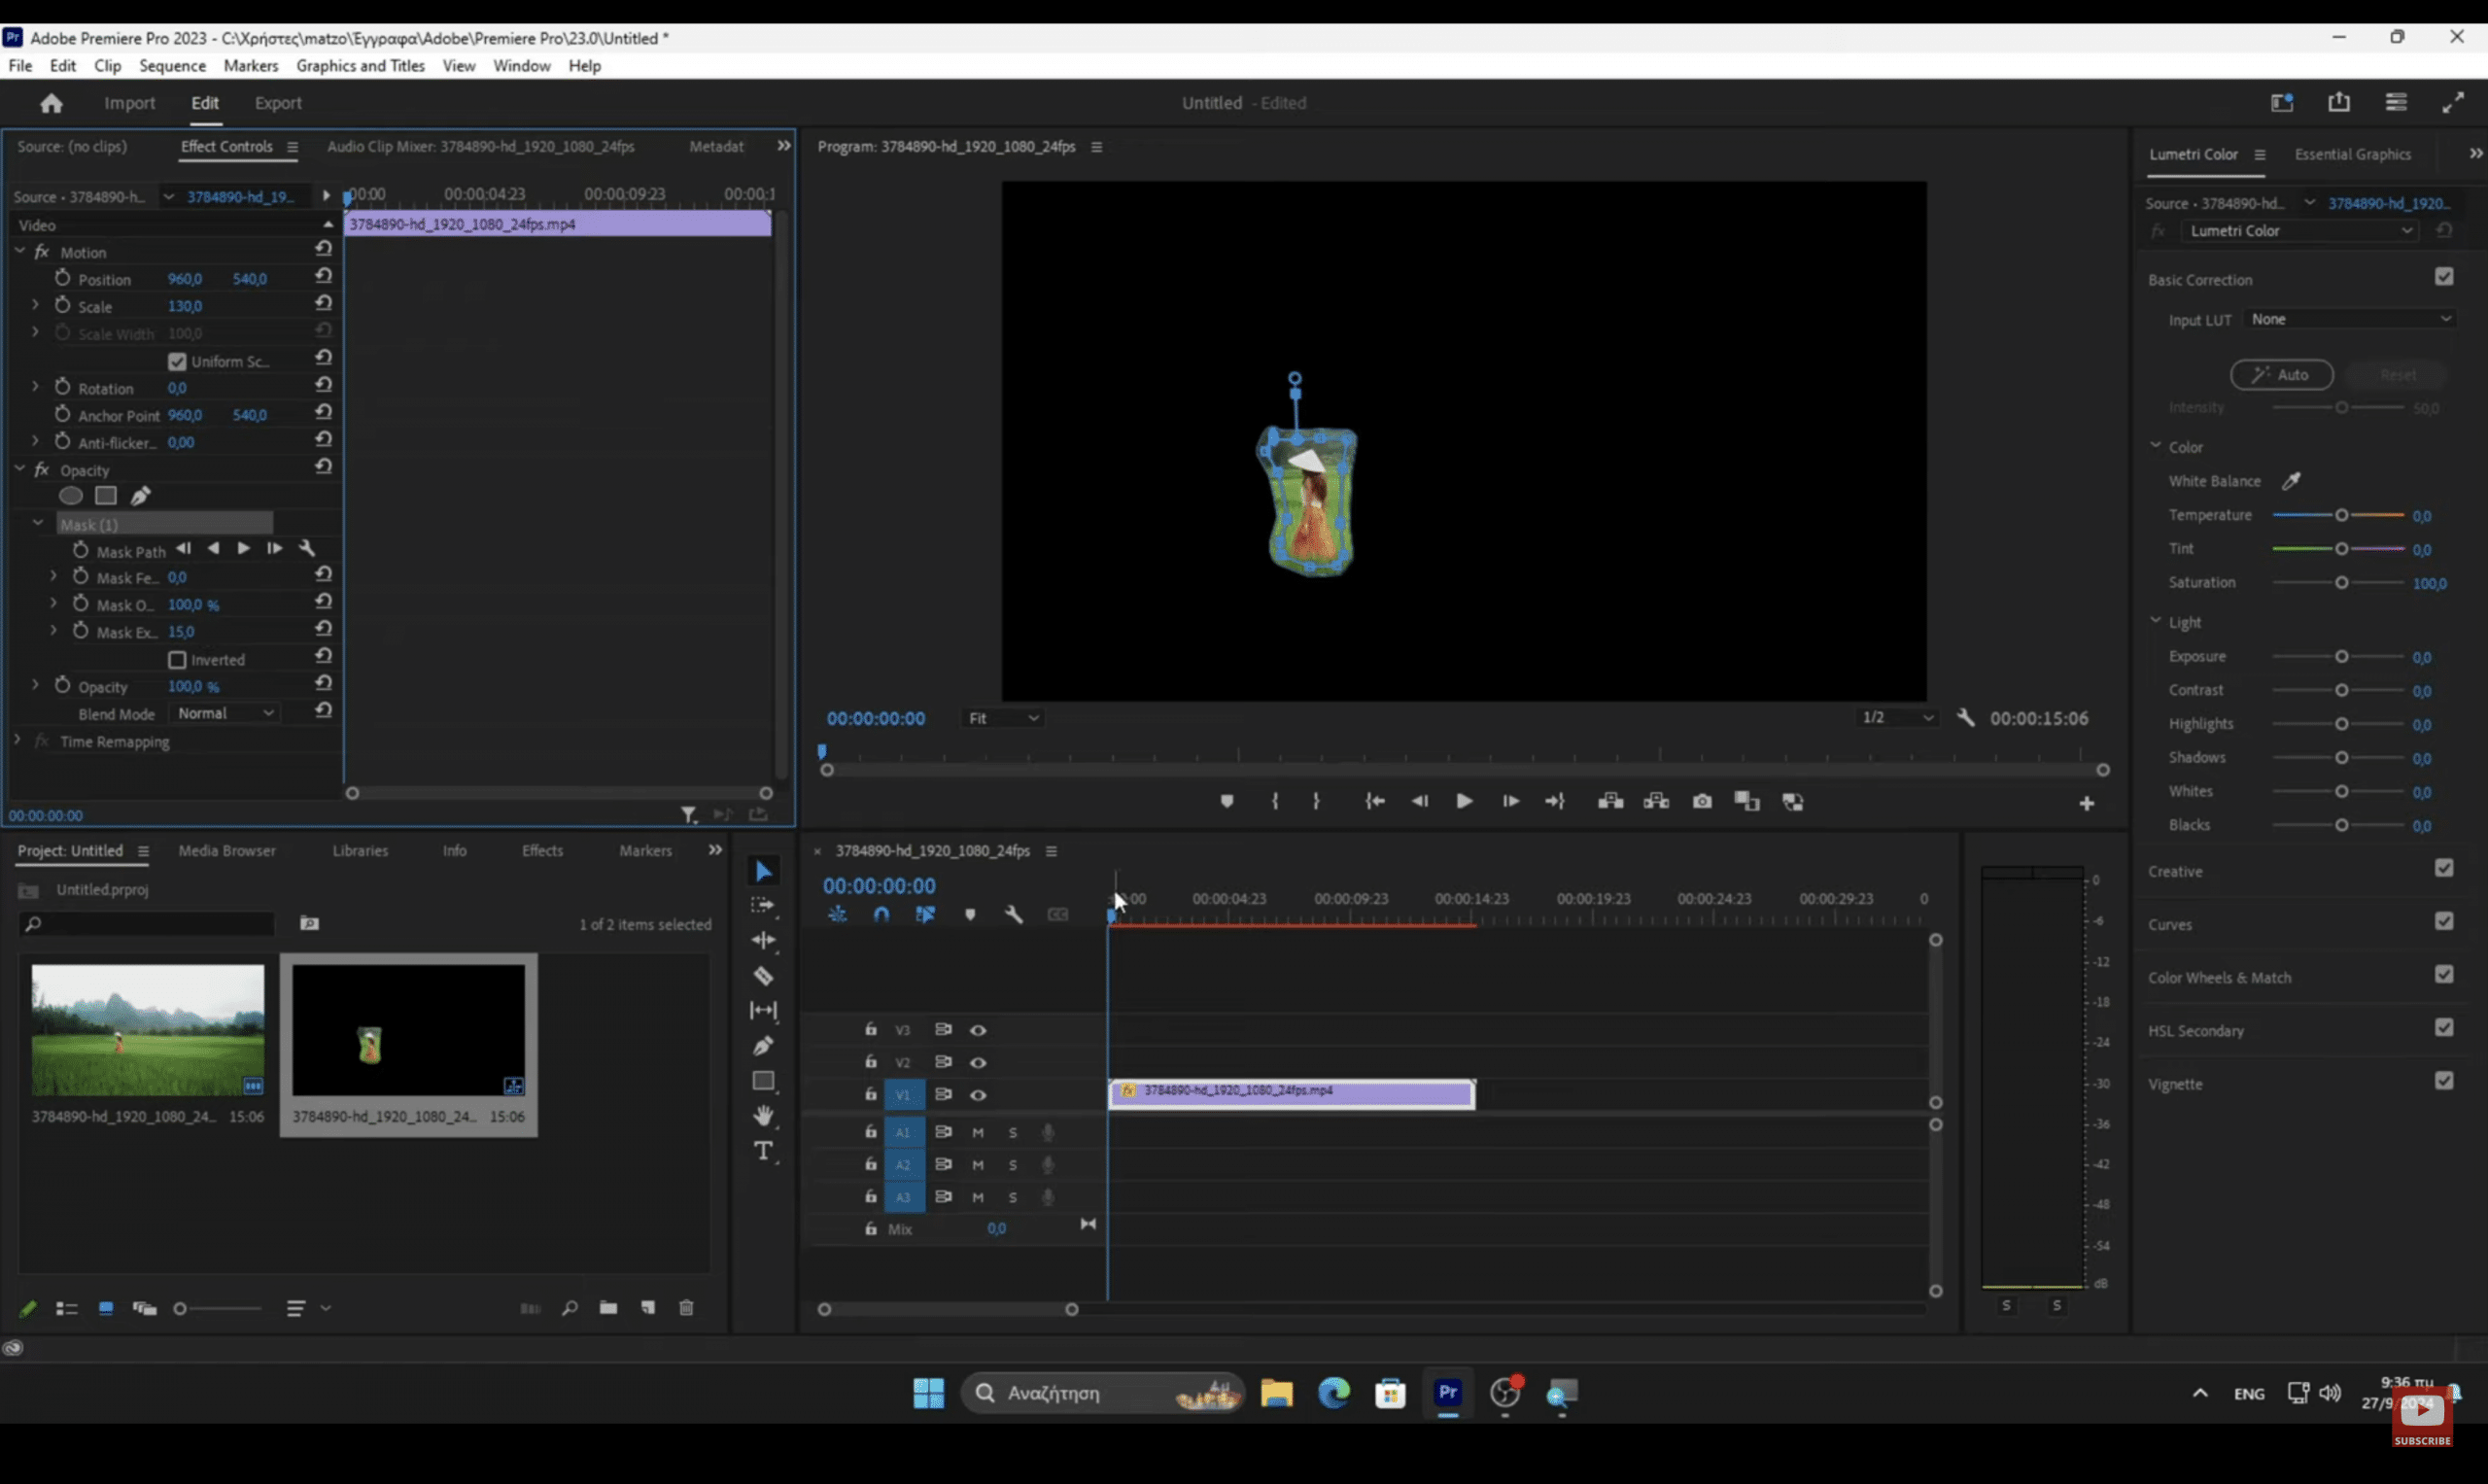
1. Video Editing Software: Adobe Premiere Pro
- Usage: 40%
- How Often: Adobe Premiere Pro or Final Cut Pro. Depending on your OS. Will be the backbone of your video editing. Either software can be used from projects ranging from short-form videos (shorts on youtube) to long projects like a full wedding footage. Like every video editing software, as you can see in the graph, both have a timeline. You add transitions, organize, cut, paste, add effects through it. It’s pretty intuitive.
- Learning Curve: For the basics like cutting clips, adding effects, and layering audio, it’s quiet easy. However, Mastering all complex effects and make them seamlessly work with each other takes a lot of time and practice.
- Advice: Get comfortable with this software AS MUCH as possible BEFORE you touch ANY of the other software. If you’re aiming a career in video editing, you MUST know this software in and out before you start relying on additional tools we’ll go over.
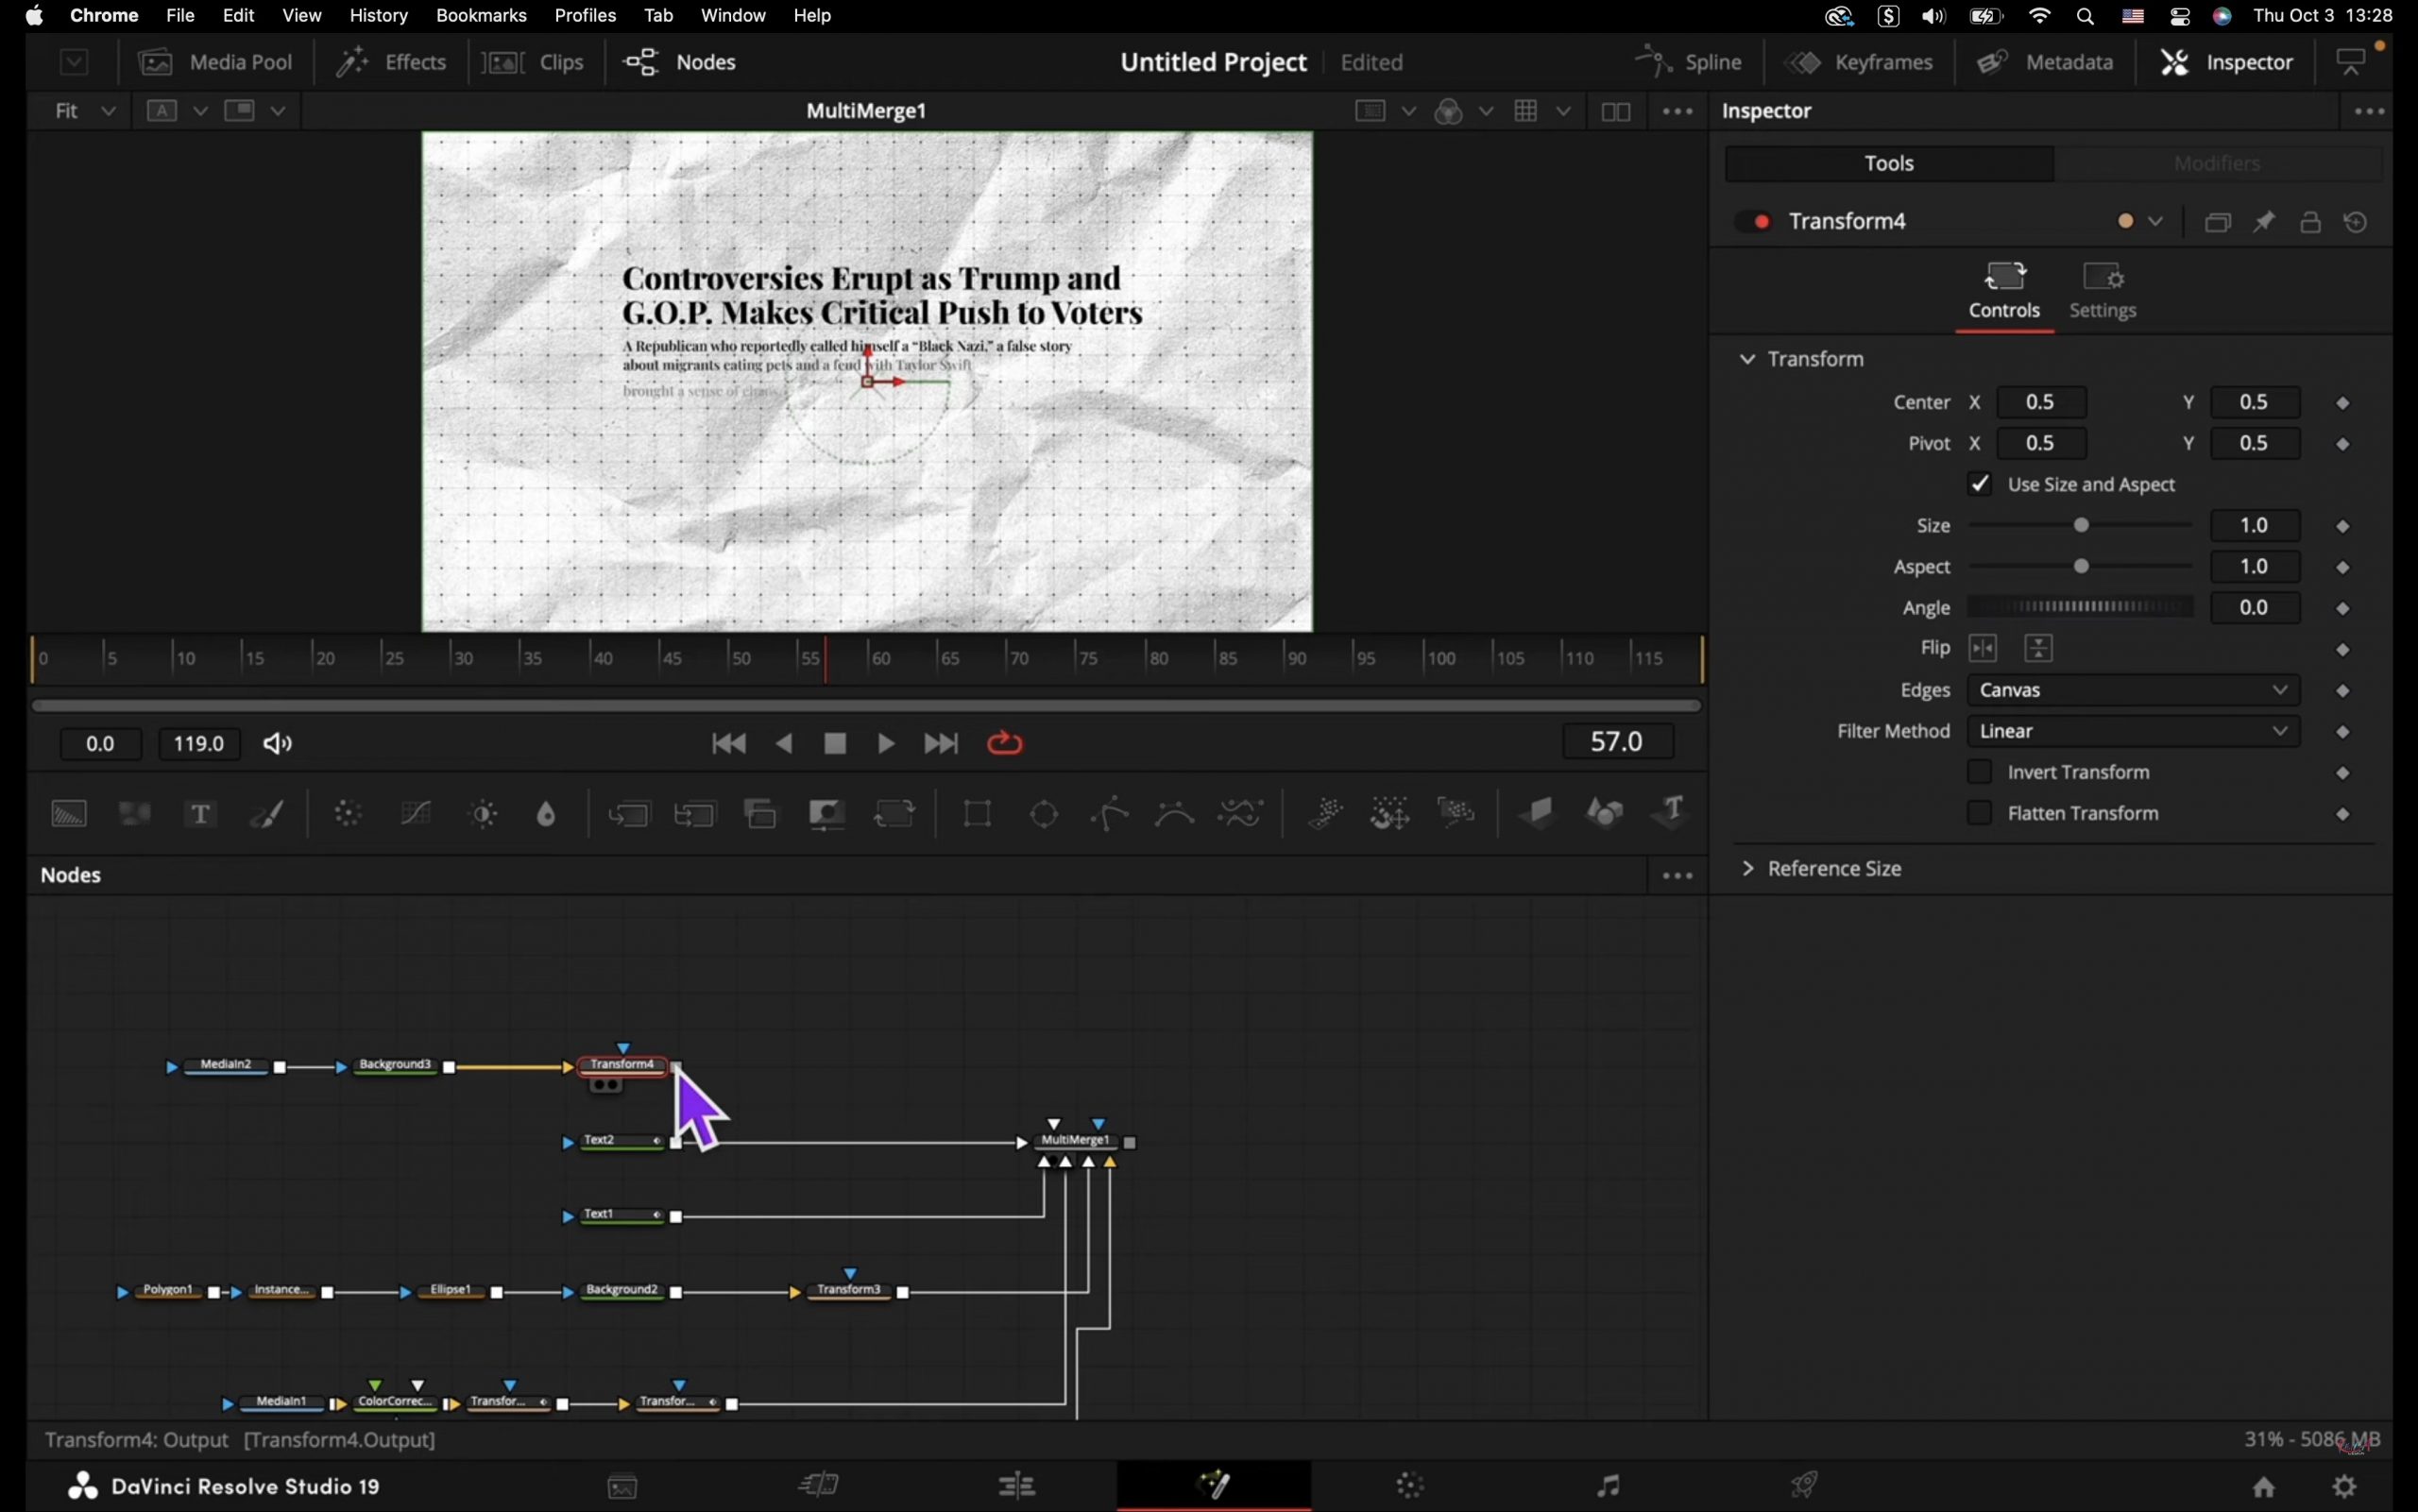
2. Color Grading Software: DaVinci Resolve
- Usage: 20%
- How Often I Use It: Though this can be used as a primary video editor it’s also popular for color correction and color grading. Sure, Final Cut & Premiere Pro, have their own color tools, however, this software offers much more control and precision. This is the software you want to use when color accuracy is EXTREMELY important.
- When I Started Using It: I started using it when I worked on a wedding project. I took an 8 hour footage of the entire ceremony and tried my best to deliver the most perfect product I could output. I wasn’t happy with the colors of Premiere Pro so I went and downloaded this software and learned as fast as possible.
- Real-World Example: Though it’s more of a “choice” for ceremonies like weddings and graduation. If you have a director (either for a short or long film), he MIGHT require you different TONES for each particular type of scene.
- Learning Curve: Now the learning curve is QUIET steep. Luckly, there are tutorials all over the internet. If you take a week or two marathon of watching and practicing you will have enough experience to use it in professional projects.
- Alternative Software:
- Adobe Premiere Pro (Lumetri Color): Good for basic color grading if you want to stay within one software.
- Filmora: A beginner-friendly editing tool with basic color correction features.
- Advice: If you’re serious about producing professional-quality work YOU HAVE TO LEARN IT. Do not run away because it will come back at you. Start with basic color grading and work your way up to more advanced techniques like masking and tracking.
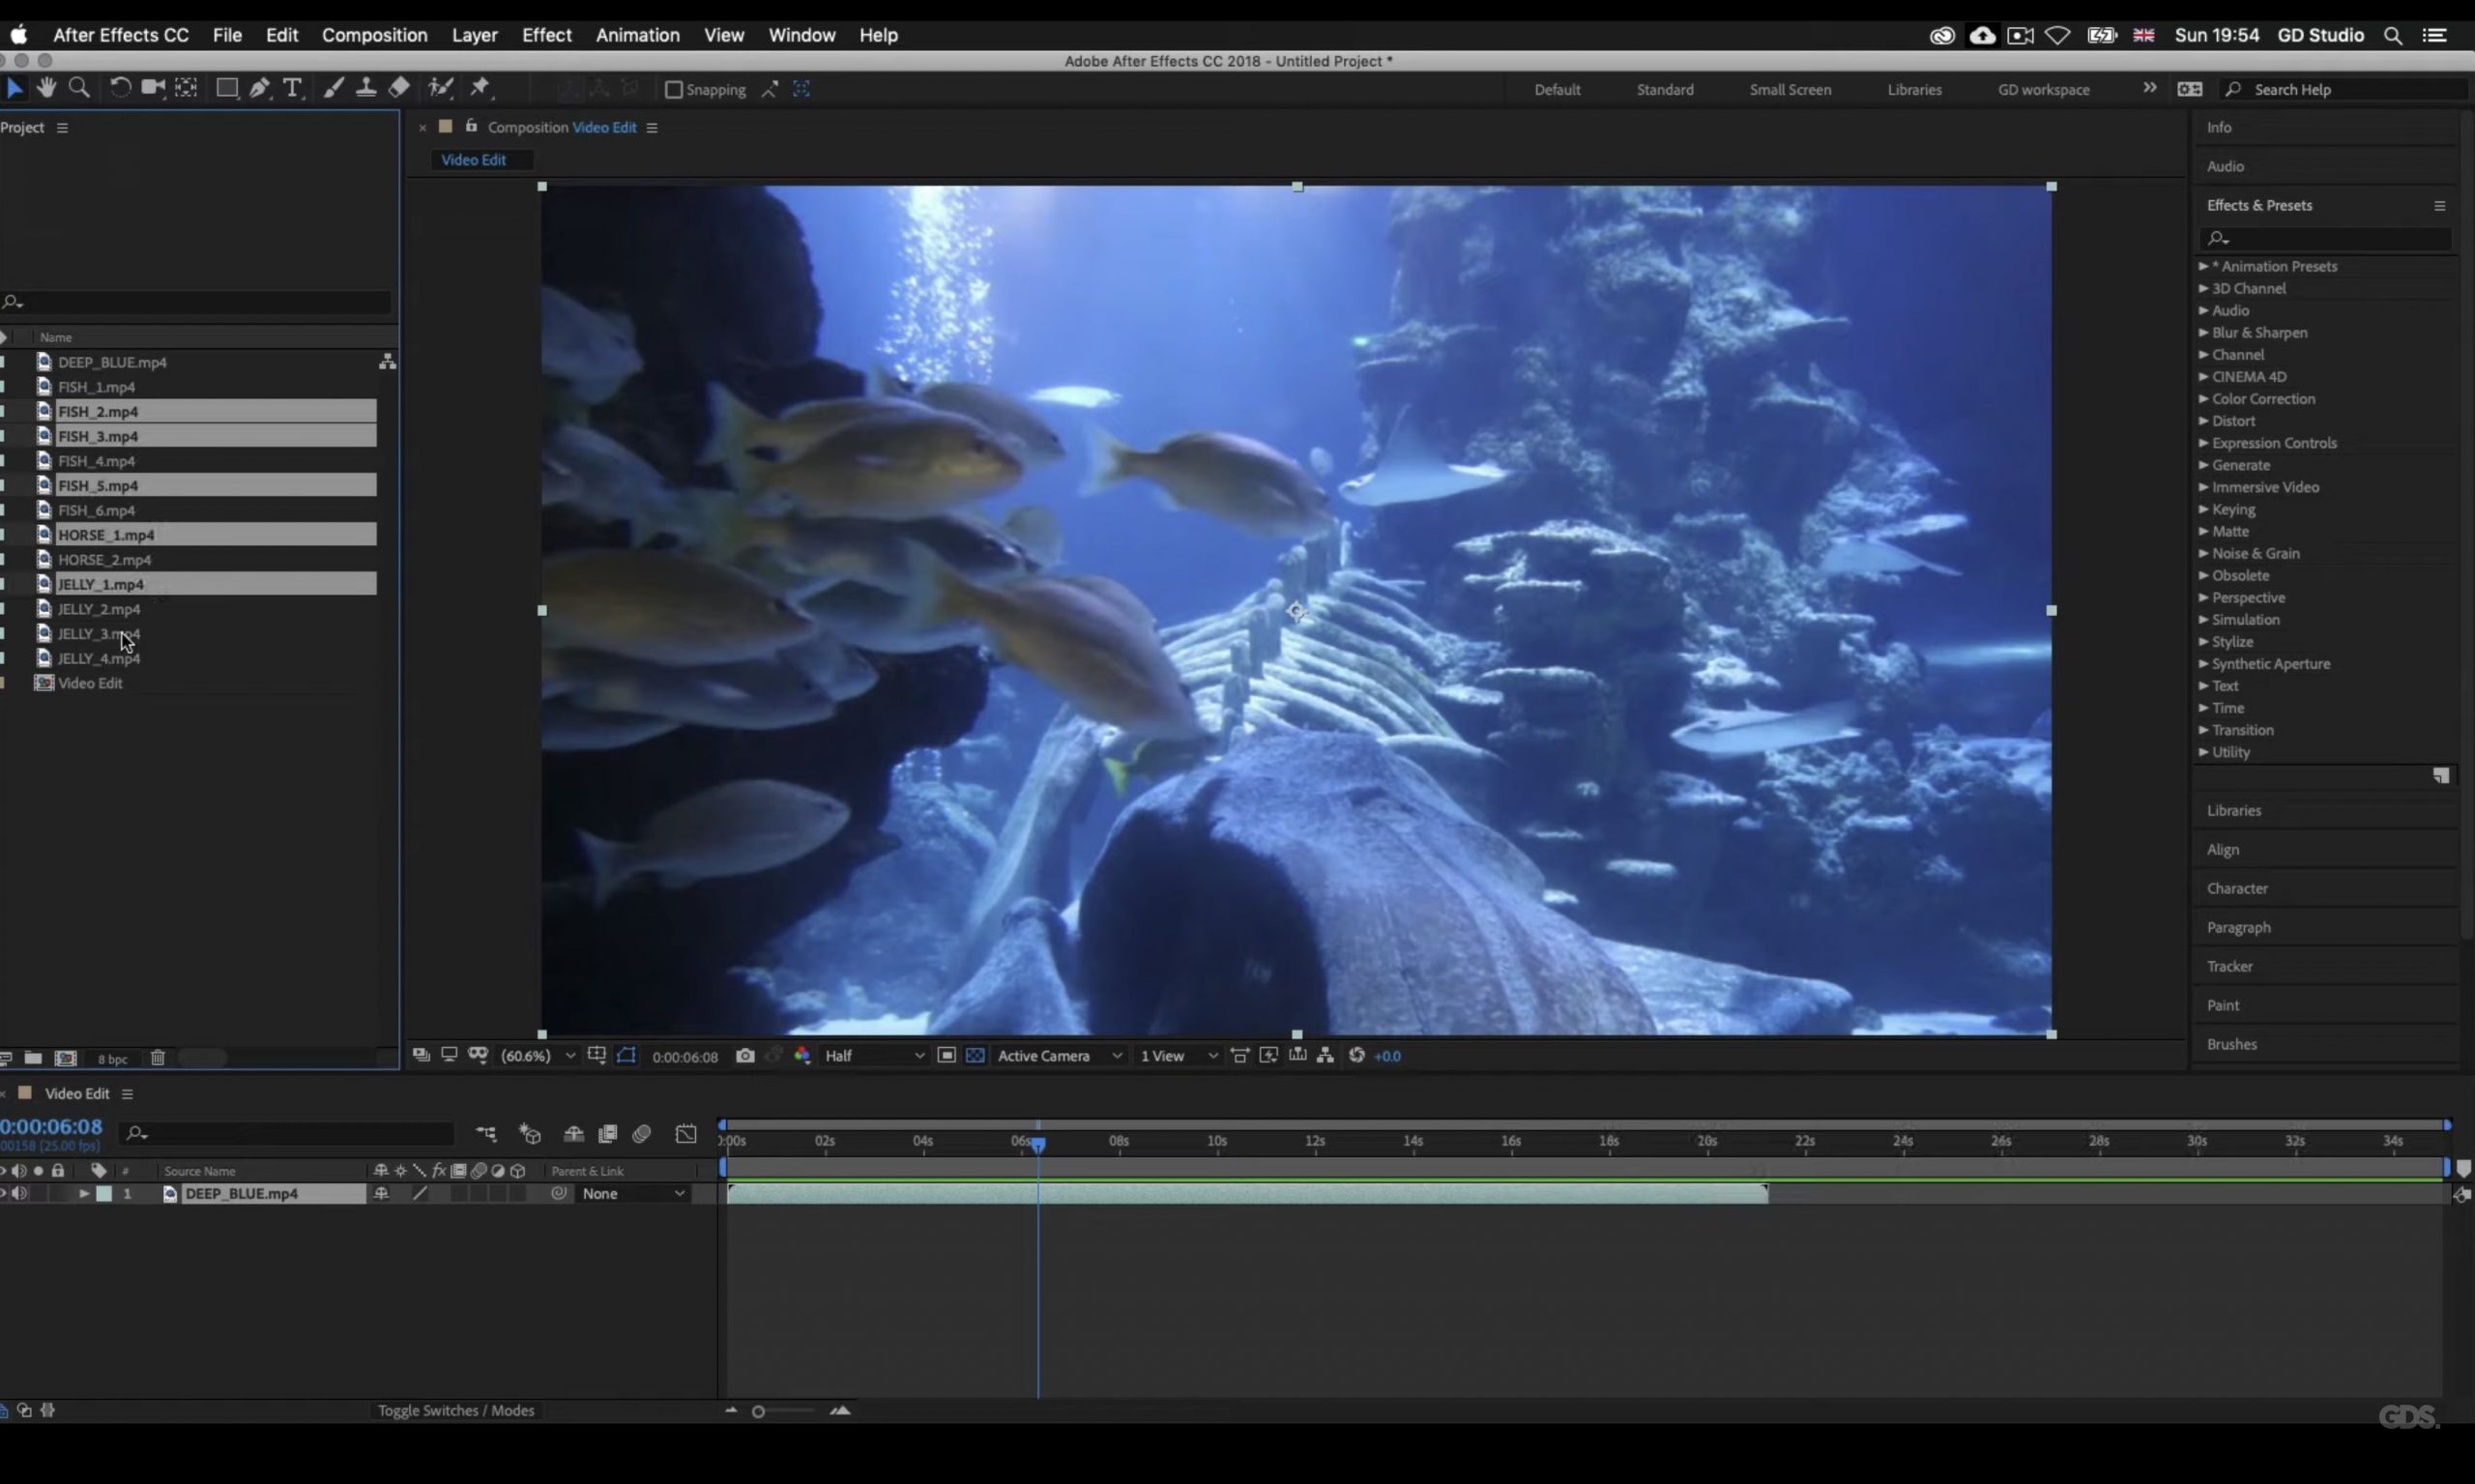
3. Motion Graphics & Visual Effects Software: Adobe After Effects
- Usage: 15%
- How Often I Use It: Adobe AE is the most common software for after effects and motion graphics implementation software for a video. Whether it’s a title sequence, lower thirds, or special effects, After Effects has the tools to make videos more dynamic and engaging.
- When I Started Using It: You’ll come across AE quite fast during your college or technical school, probably during the second semester. If you ever want to animate any text or image (outside the video), you’ll have no choice but to use it. You will then use it consistently to add a lil spice to your videos.
- Real-World Example: Have you seen those commercials where they have a product’s description or name or features with cool colorful letters that vibrate and are animated?
- Learning Curve: Definitely a big learning curve. It’s not as intuitite as a regular video editing software. Nonetheless, you HAVE to put up with the difficulty if you want to add those cool animations which in turn will open the possibility to work on a wide variety of projects.
- Alternative Software:
- Apple Motion: A good alternative for Mac users, it’s more affordable but less feature-rich than After Effects.
- Blender: Free and open-source, great for 3D visual effects.
- Advice: Even if you’re focused on video editing, learning the basics of After Effects will make your work stand out. Start with simple animations and text effects, and gradually explore more advanced features like compositing and tracking.
4. Audio Editing Software: Adobe Audition

- Usage: 10%
- How Often I Use It: Mostly used for audio clean up, mixing tracks, and ensuring that sound is balanced throughout the video.
- When I Started Using It: It won’t be emphasized in school. You will either pick it up during an internship or during your first gig. Audio is just as important as video it can VASTLY improve the final product. It should become part of your workflow quiet early during your school years.
- Real-World Example: You know documentaries have interviews and they’re usually out in the street (at least that’s the trend now)…there’s going to be a LOT of noise and speech quality will be severely impaired. Speech quality may not be a problem for younger populations but hearing loss is quite common among adults and older generations thats why , in order to leave an impact on a bigger audience, you have to make sure the speech is CRYSTAL clear. You can make sure it even reaches people with hearing loss by adding effects that make the high frequency consonants (k,th,f) more powerful.
- Learning Curve: For speech quality, noise reduction , learning curve is quiet fast. However, audio tracking & mixing, it can take a while.
- Alternative Software:
- Audacity: A free alternative that’s great for beginners but lacks advanced features.
- Pro Tools: An industry-standard tool for high-end audio production.
- Advice: Don’t neglect audio!It is just as essential to deliver a high quality product and to reach as many viewers/listeners as possible. You also don’t want people saying “I can’t understand what the bride is saying” when everyone’s watching a wedding ceremony, that means no one is going to recommend you for future gigs.
5. Project Management Tools: Trello & Frame.io
- Usage: 5%
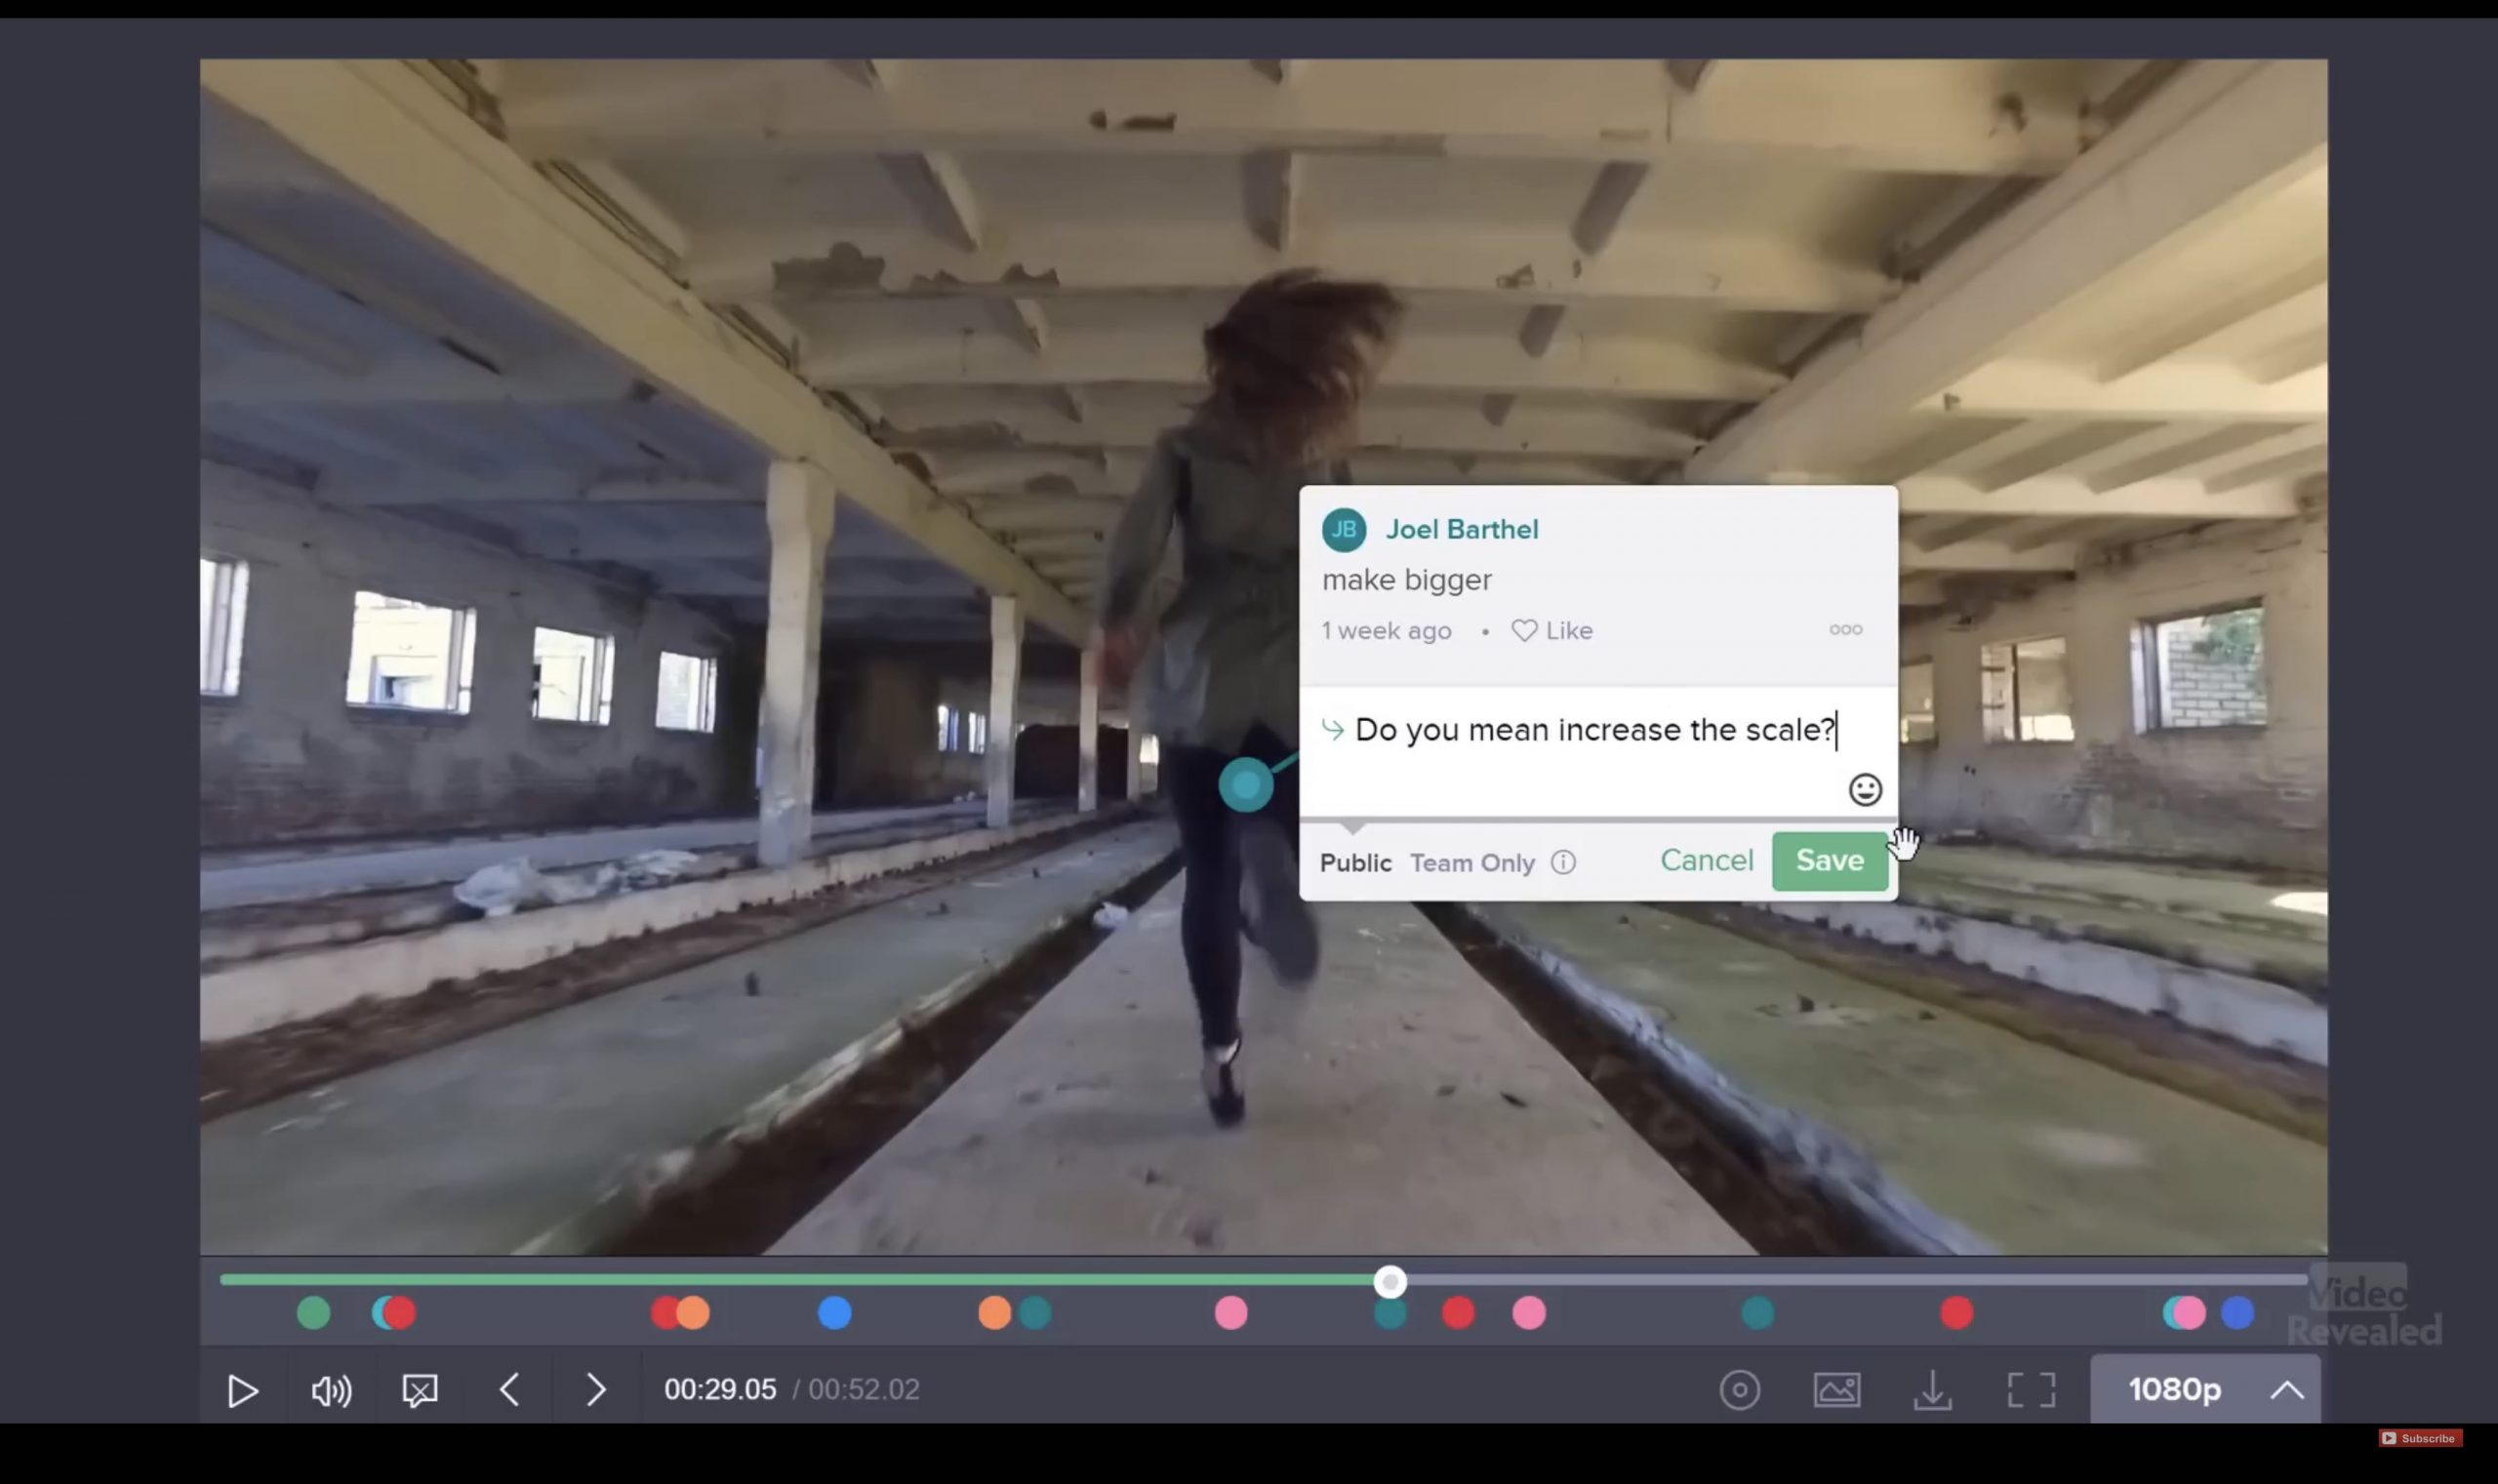
- How Often I Use It: Trello is a paid application, it’s optional. It’s basically a project management software. You can use it to organize tasks and what not. However, Frame.io , though also has a paid subscription, it’s a MUST feature to work with clients. It will help you get feedback on a specific section or frame of the video. Your client can just type comments on the section she/he thinks needs revision.
- When I Started Using It: Frame.io became part of my workflow once I started with directors, interviewers, youtubers. Basically people who are very strict with the results they want.
- Real-World Example: Say you work on a small documentary (biography, social issue, etc). You can upload it to frame.io and your client can easily write comments on specific sections of the video (or frames) which you can work on later.
- Learning Curve: Very simple to use. Both Trello and Frame.io are intuitive.
- Alternative Software:
- For project management: Monday.com. It’s a more robust project management platform, useful if you’re managing multiple projects.
- Wipster: Another feedback tool that works similarly to Frame.io. The screenshot taken above is wipster.
- Advice: Get used to organizing your workflow early this should be quiet easy. Frame.io or Wipster are invaluable when working with clients. Mention Wipster to clients you believe will require lots of revisions. It will save you time!
6. Storage & Backup: Google Drive & Dropbox
- Usage: 5%
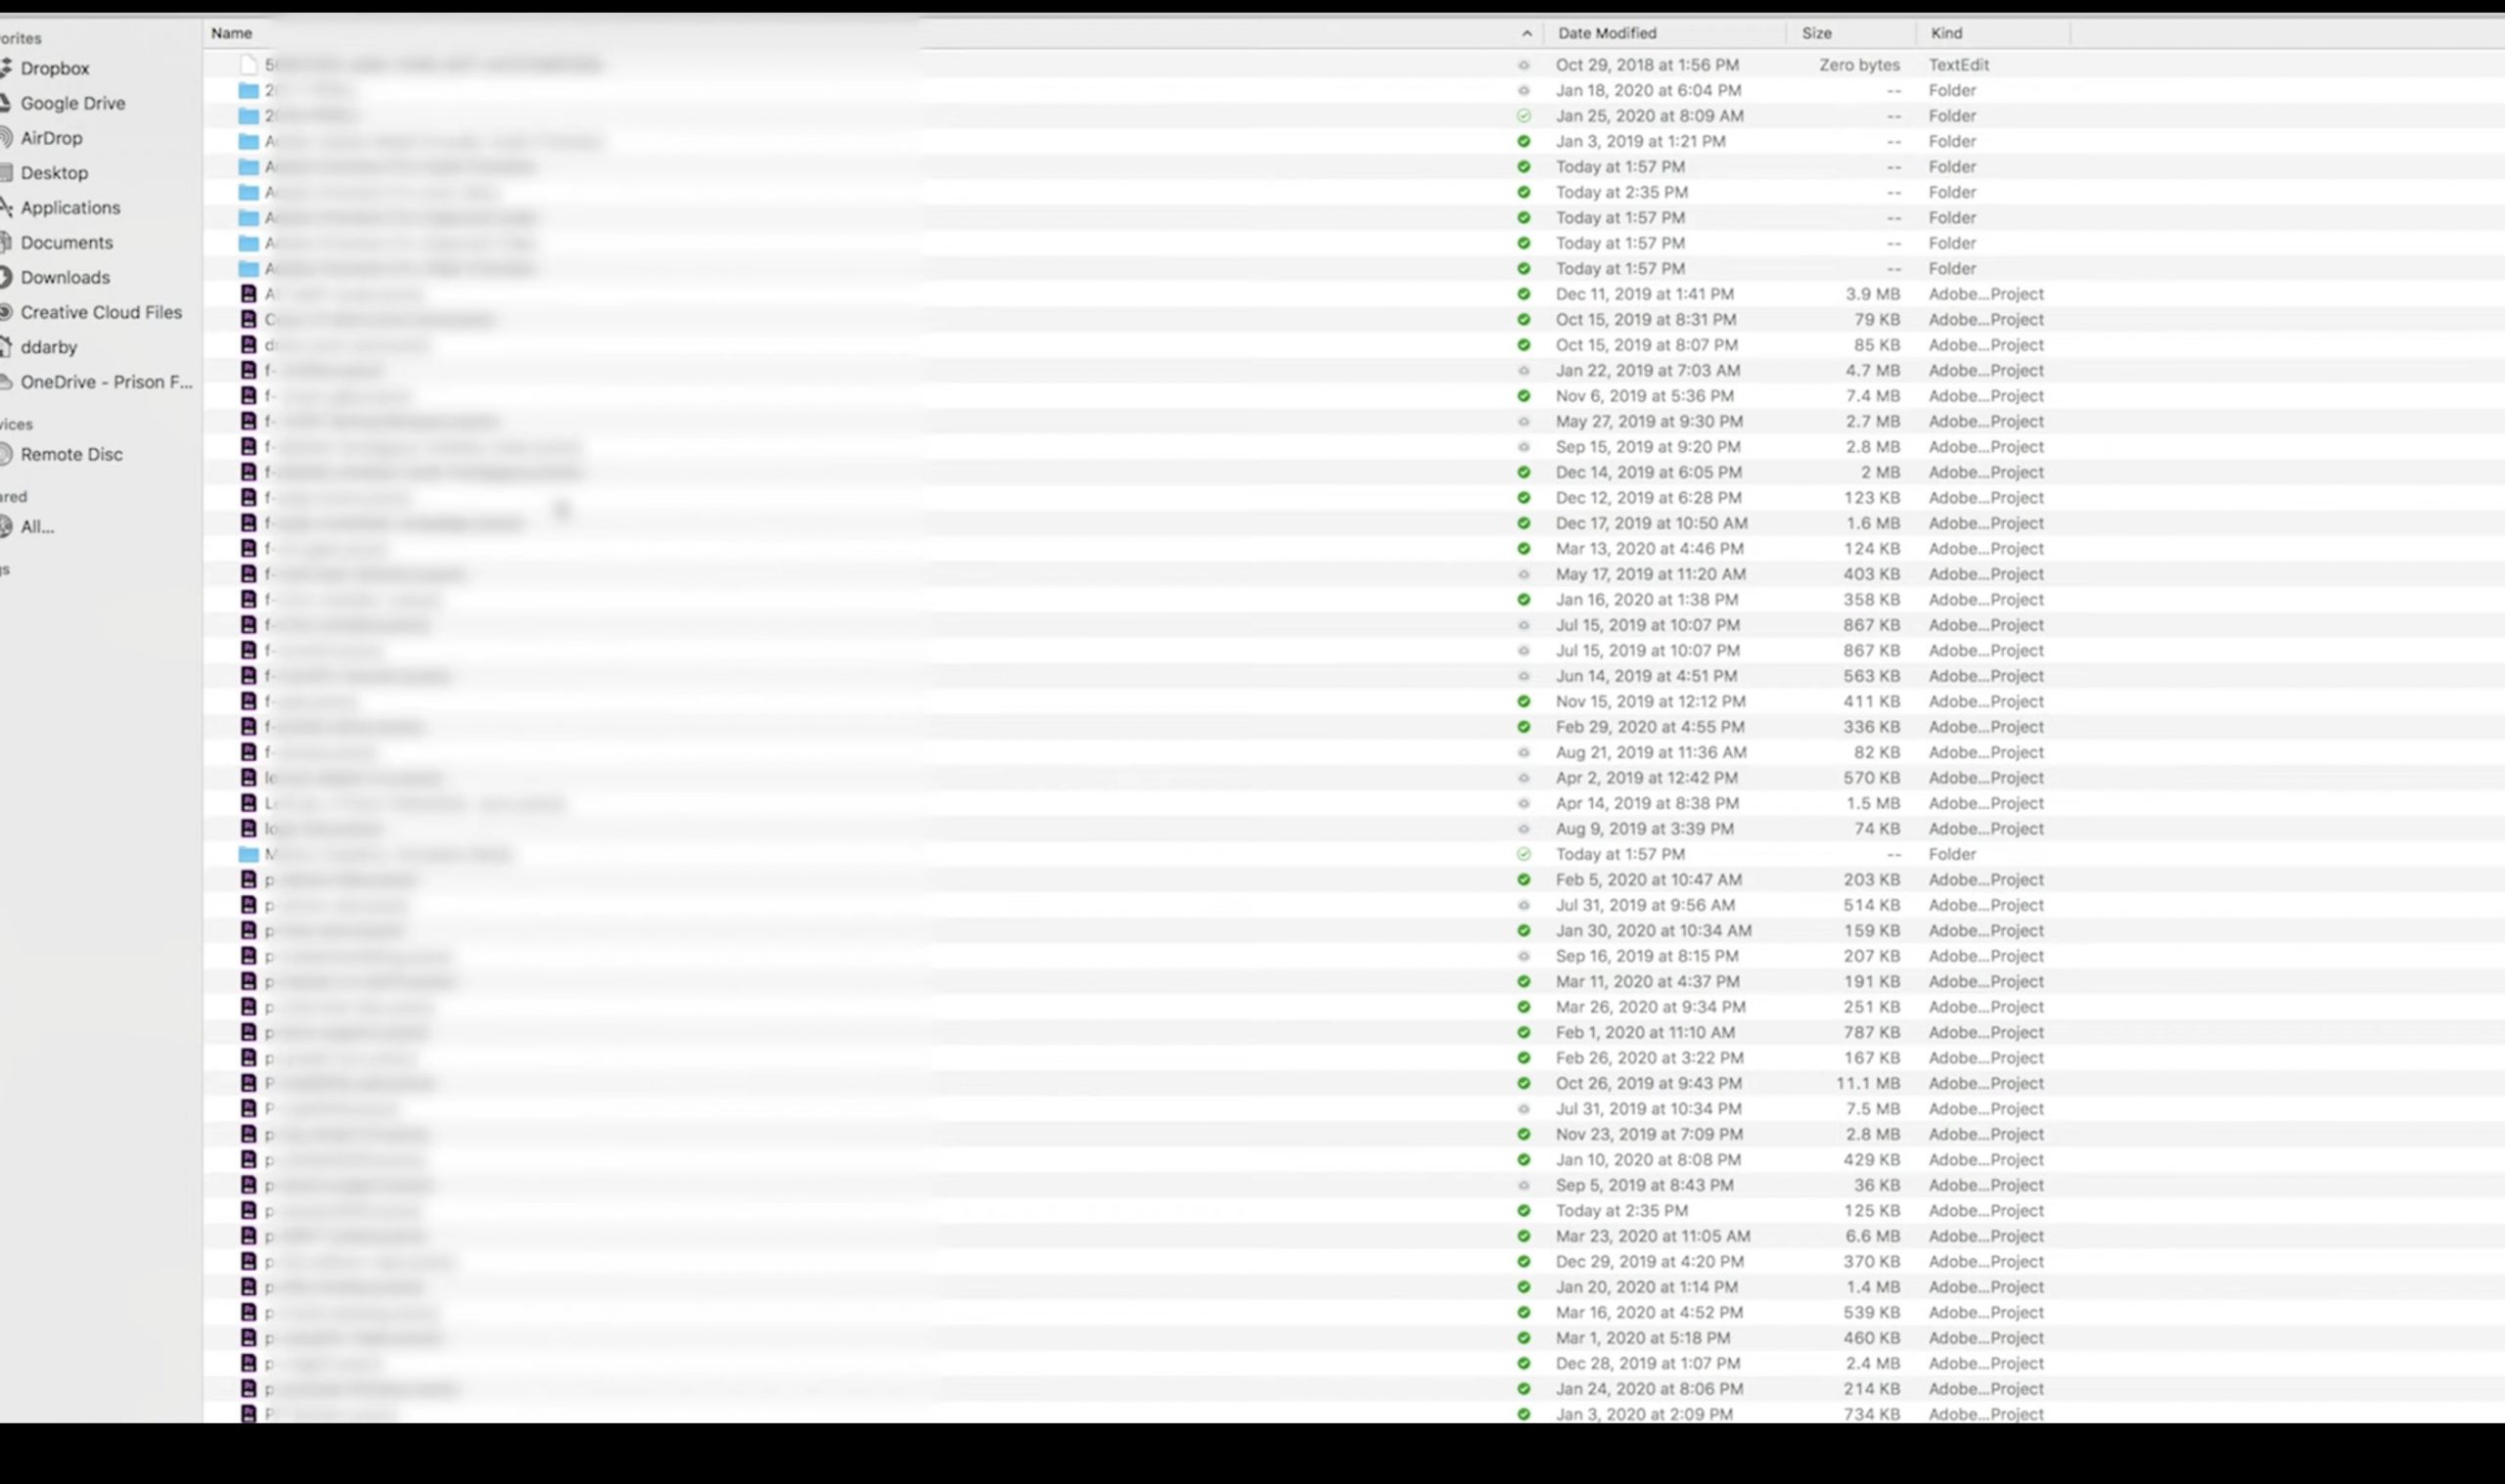
- How Often I Use It: Storing large video files and project backups is a must. Just imagine losing a project you had worked on for 2 days? Not only do I use Drive and DropBox to keep my projects safe but also to share it with clients and other people who may be working on the same project.
- When I Started Using It: I started using dropbox during my first year as a student like most people. During my second year , it became a tool to collarabote with other students.
- Story: I worked on a documentary that took several months to complete. Me, the director and the music engineer, use dropbox to work/share files update the project and so on. There was a time my PC malfunctioned during those 5 months but luckily i had saved the project a day before it happened and did not disrupt the team’s workflow.
- Learning Curve: Very intuitive and straighforward. What does take some time is organizing your files into folders. It’s very to just drop them all over the place so I suggest you start being neat and clean from the start.
- Alternative Software:
- OneDrive: Another cloud storage option with seamless integration with Microsoft Office tools.
- Sync.com: A privacy-focused cloud storage option with end-to-end encryption.
- Advice: Back up your files from the start. . Hard drives fail, but cloud storage ensures you have an accessible and safe backup. Get into the habit of organizing your files properly to avoid losing important footage.
7. Media Encoding & Delivery: Adobe Media Encoder
- Usage: 5%
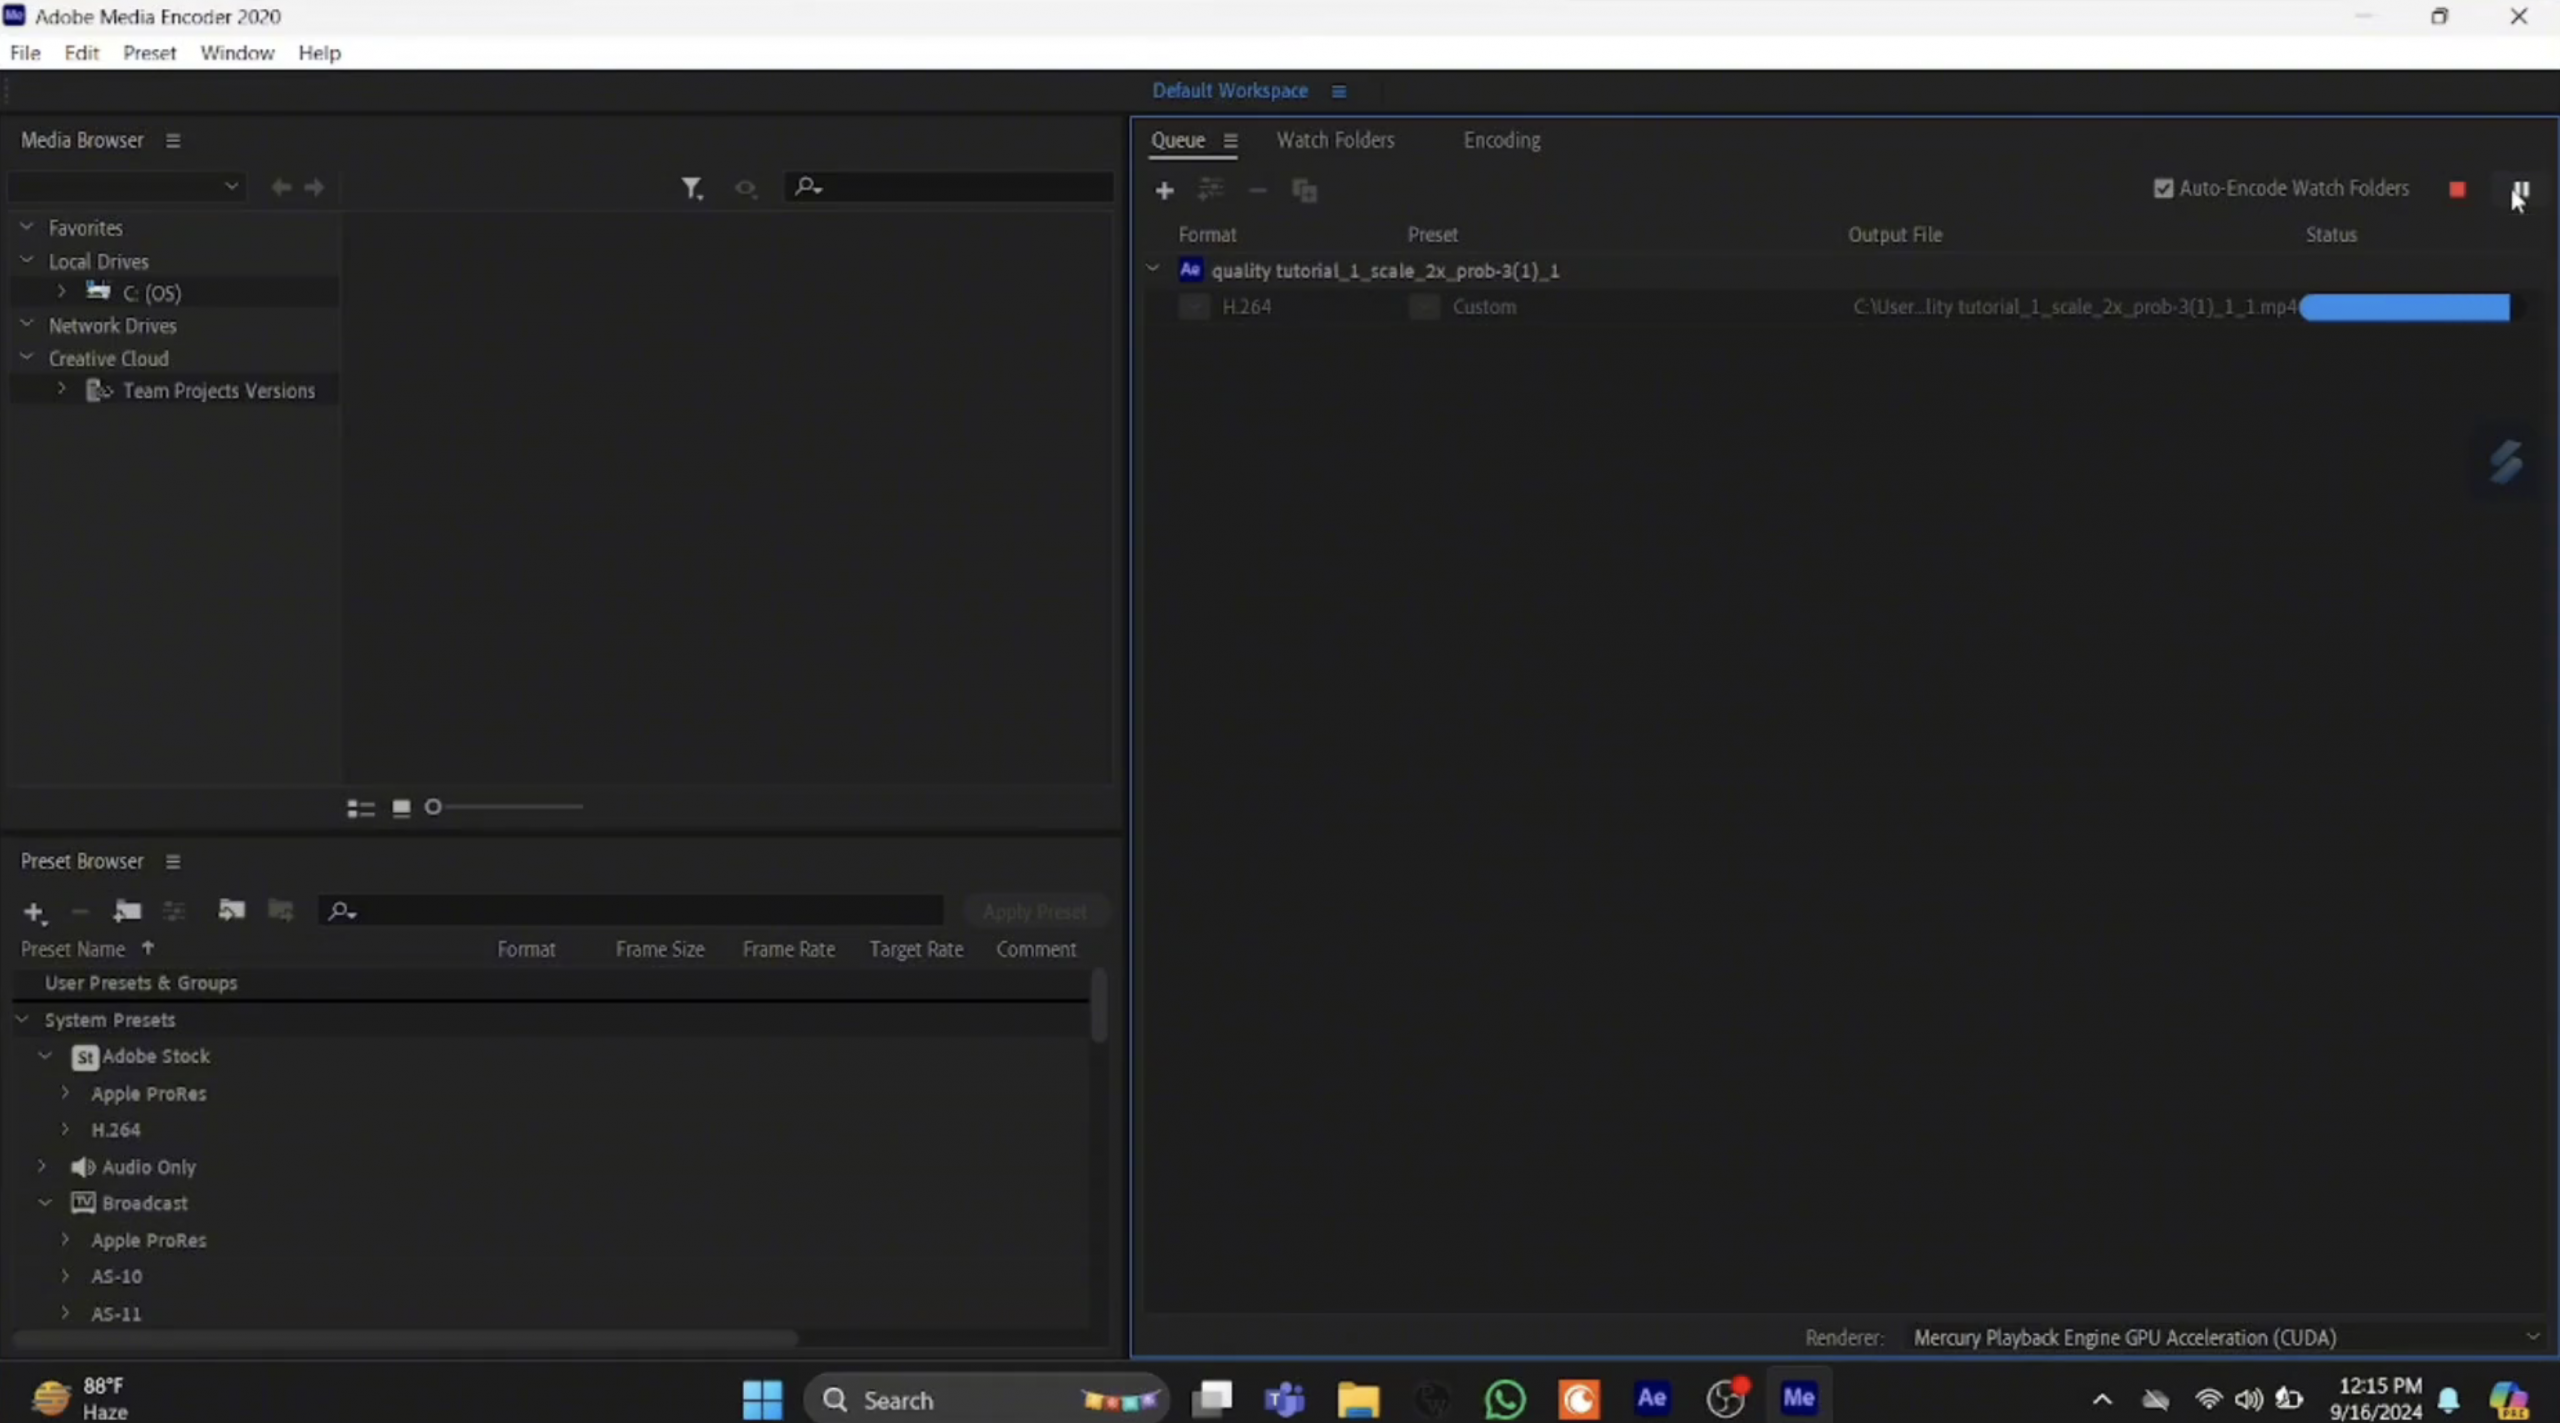
- How Often I Use It: This is a software to export videos in different formats and quality. I use it everytime I finish a project and export in all useful formats for my client.
- When I Started Using It: Quickly. Right after my first gig. We needed to make sure the footage worked across different devices.
- Real-World Example: You will usually create the presets you’re mostly used to work with then just click export to get the desirable formats. It is pretty common , for example, to export for both broadcast media and web media, in the case of public videos.
- Learning Curve: The challenge lies in choosing the right format and compression settings for each platform. You may not know which format is best for each platform when you start but a little bit of research will set you straight.
- Alternative Software:
- HandBrake: A free, open-source video transcoder.
- FFmpeg: A command-line tool for advanced users who need more control over encoding and conversion.
- Advice: Understanding how to export your videos in different formats is crucial, especially when delivering content for multiple platforms. Learn the basics of Media Encoder and familiarize yourself with the different settings for web, TV, and social media.
Final Thoughts
For aspiring video editors, my biggest advice is to start learning these tools early. The more proficient you become with them, the faster and more efficiently you’ll be able to work. Video editing is a highly competitive industry, and having a strong command of your software toolkit will give you a huge advantage. Don’t hesitate to explore alternative software as well—sometimes you’ll find a tool that fits your style better. Experiment, practice, and always keep learning. Your future projects (and clients) will thank you.
Author Profile
- I am physicist and electrical engineer. My knowledge in computer software and hardware stems for my years spent doing research in optics and photonics devices and running simulations through various programming languages. My goal was to work for the quantum computing research team at IBM but Im now working with Astrophysical Simulations through Python. Most of the science related posts are written by me, the rest have different authors but I edited the final versions to fit the site's format.
Latest entries
 LaptopsJuly 4, 20265 Best Laptops For Sims 4 2026 (All Expansions Mods & CC)
 wowDecember 18, 20255 Best Laptops For World of Warcraft – Midnight & Classic (2026)
 LaptopsDecember 17, 2025The 4 Best Laptops For Virtualization of 2026 (10-50 VMs ATSM)
 Hardware GuideDecember 17, 20252026 Beginner Guide to Reading Computer (Laptop) Specifications