How To Upgrade RAM on Laptop 2022 (Complete Guide)
Upgrading or replacing RAM is the easiest thing when it comes to tinkering with laptops.
In fact it’s probably the easiest thing to do when it comes to fix/update any type of electronic device.
Now here’s the deal:
- If your laptop has a door for RAM, it becomes even easier:
You would just have to unscrew the compartment , nicely place a RAM stick and voila. It’s done done! Get back to gaming….I mean studying!
Unfortunately…
Most laptops do not have that compartment especially if they’re modern!
Chances are your laptop will look more or less like this:

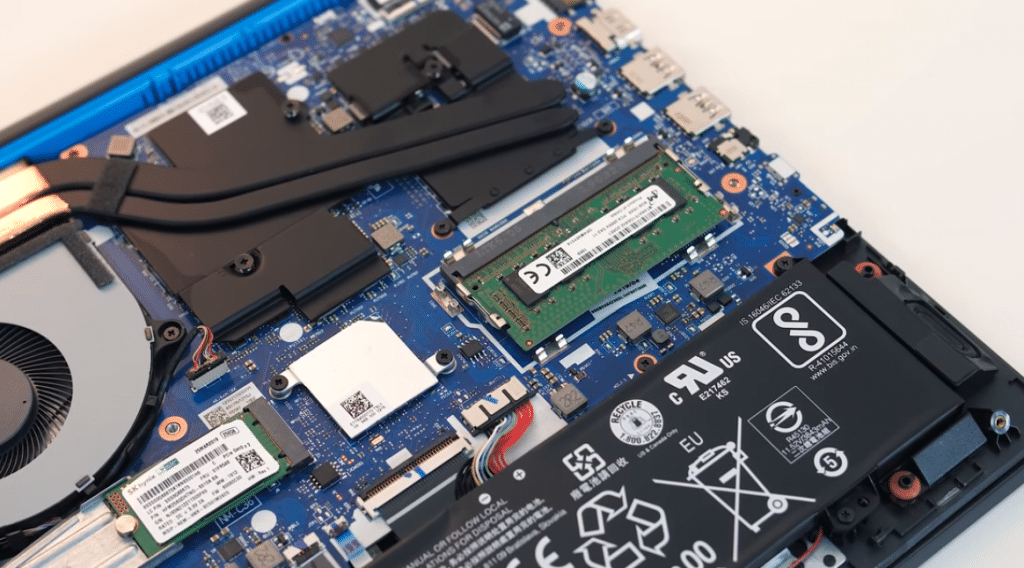
There will no small compartment for RAM nor even a compartment for battery. You will have to remove the entire bottom panel to replace or upgrade ANYTHING.
It’s still quite easy but….
a) You will need to be gentle when you remove the bottom cover and do this with the technique I’m going to describe
b) You have to be patient and gentle when you remove the screws, you don’t want stripped heads.
Anyone can do the upgrade really as long as you read this short tutorial carefully, you should be fine.
Before you do the upgrade!
Two things you gotta CHECK before you buy a new RAM stick and before you remove the bottom panel.
1. Find out if your laptop is upgradeable
You don’t want to remove the entire back cover only to find out there’s no extra slot for additional RAM!
Some laptops only have ONE slot available.
 Ex: The Lenovo L340 Ideapad only has one slot for RAM. In this scenario, all you can do is replace the on-board RAM with a newer, faster and bigger RAM.
So if you’re thinking of “ADDING” extra RAM , CHECK whether or not there is a free slot available.
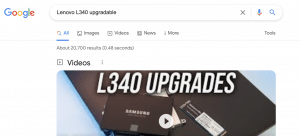
A) Google it
The best and quickest way is to type your laptop’s model name on Google + Upgradeable. Go through the search results (it’s best to click on the manufacturer’s site).
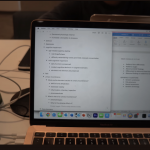
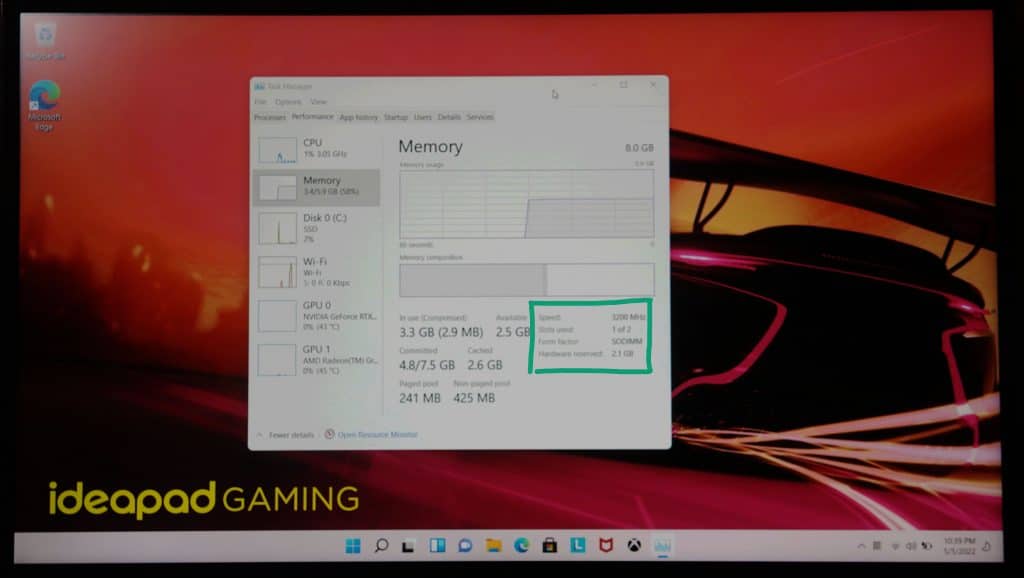
B) Use CTRL+ALT+DEL
Click on the memory tab and look for the “Slots used” section as shown below. If there is a free slot it should say 1 out of 2 slots used.
2. Check if the RAM you’re buying/using is compatible
Yup, just because you took out that OLD RAM STICK out of an old laptop doesn’t mean you saved yourself a lot of money. Your laptop might not SUPPORT it.
A) Find out what kind of RAM your laptop supports
Press CTRL+ALT+DEL. Bring up the task manager and click on the memory TAB:
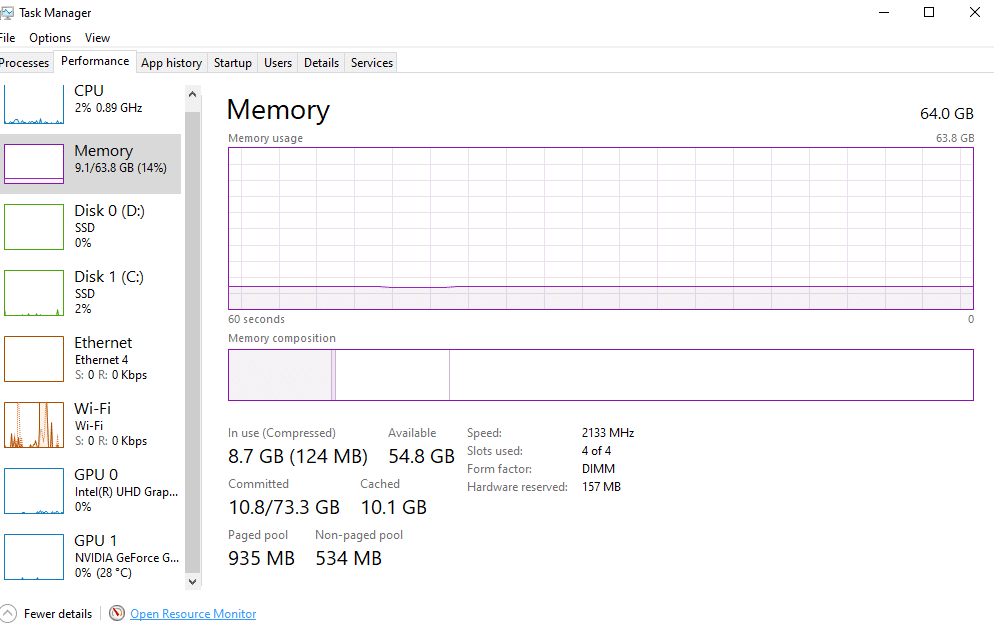
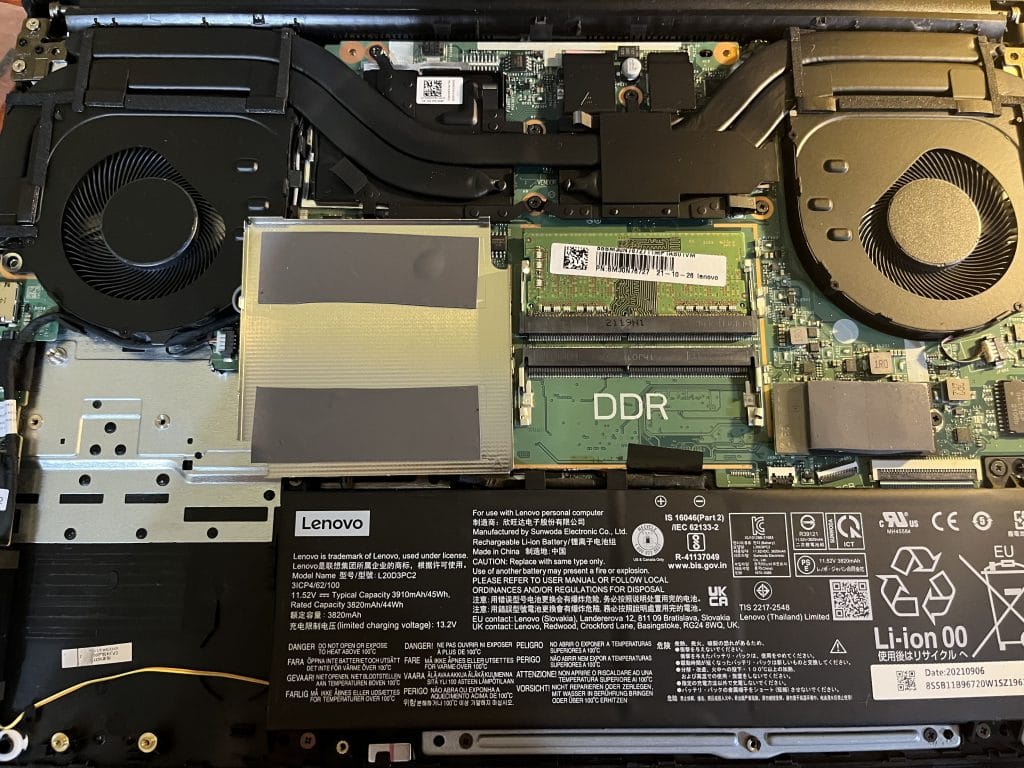
Look at the upper right corner and write down whether it says DDR3, DDR4, DDR2,etc. If it doesn’t say DDRX , then look at the speed 2133MHz.
3200MHz=DDR4
With that out of the way, let’s do the upgrade….
The Three Steps to Upgrading RAM
Obviously you need to turn off your laptop and flip it over! Then….
1. Get the Tools
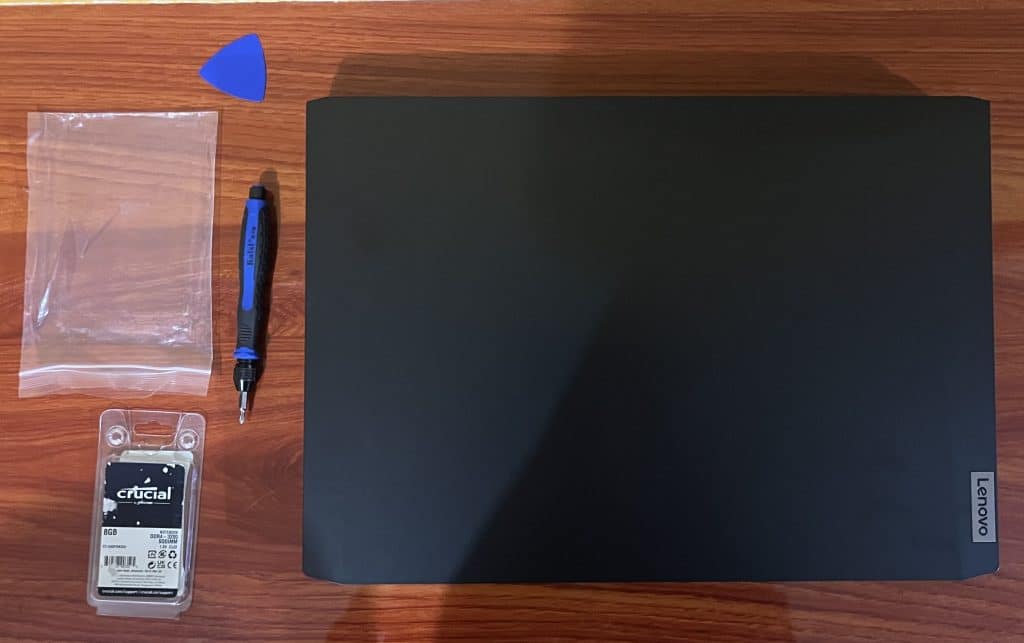
This is probably the most important step. Get the right tools and this is going to be a breeze!
- Small Bag: You need a couple of bags to hold all the screws in. You could use a couple of bottle caps too.
- Compatible RAM Stick: If its not compatible it won’t fit and you will remove the entire bottom panel for nothing.
- Laptop Pick: You will use this piece of plastic to remove the bottom panel once all screws have been removed. You could use a knife or any thin but strong piece of plastic too.
- Compatible Screw driver: Laptops usually use small crossed screws so you need a small cross screwdriver. If you don’t get the correct size you may stripped screw heads.
If you have 15 bucks, you can get every single tool you need for every type of upgrade : Storage Upgrade, RAM Upgrade, Wifi Upgrade, etc, for every laptop down below:
This is basically the ultimate swiss army laptop tool.
3. Find out what screws to remove and remove them.
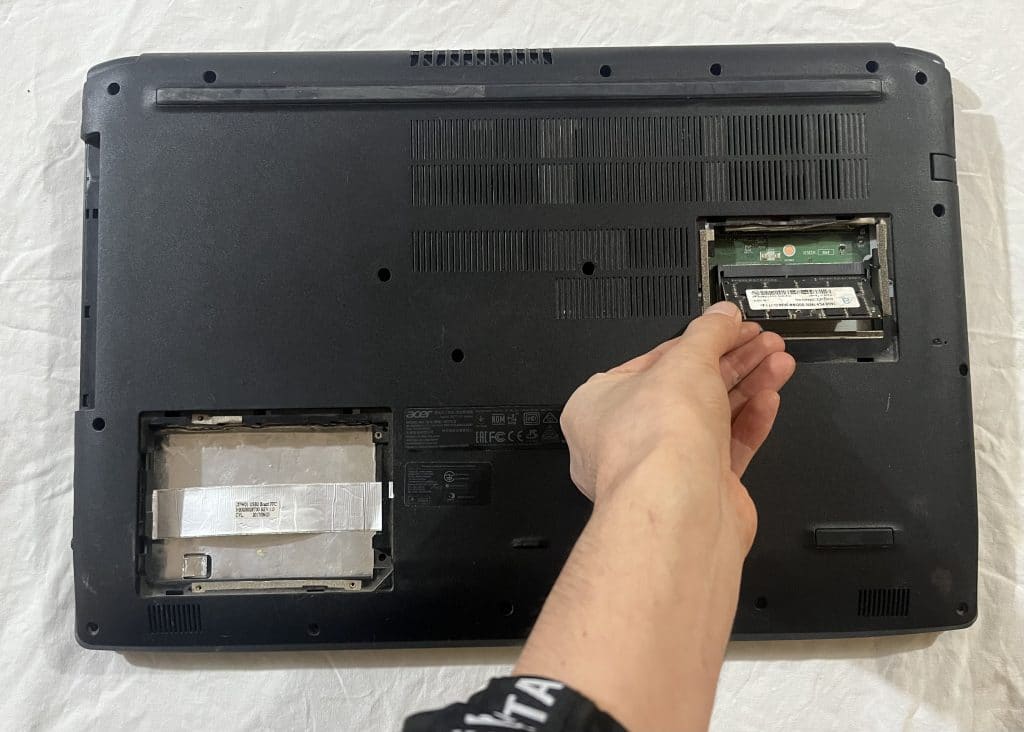
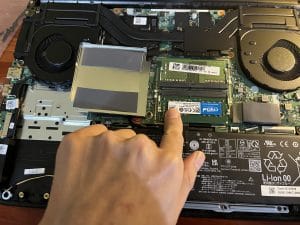
If your laptop has a small compartment reserverd for RAM as shown below, you only need to remove 3-4 screws.
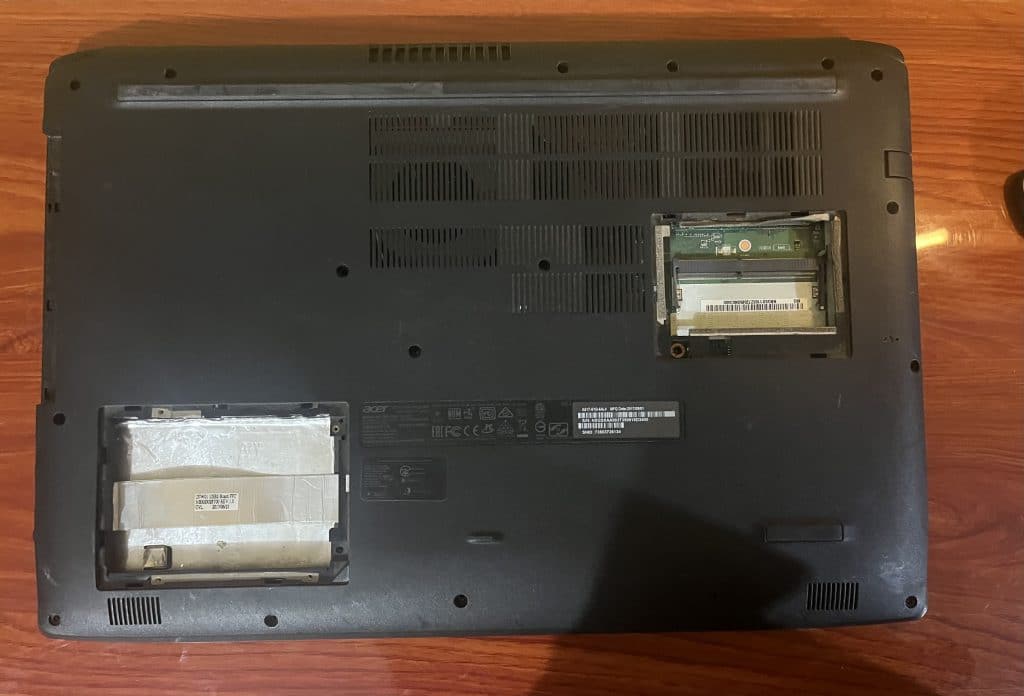
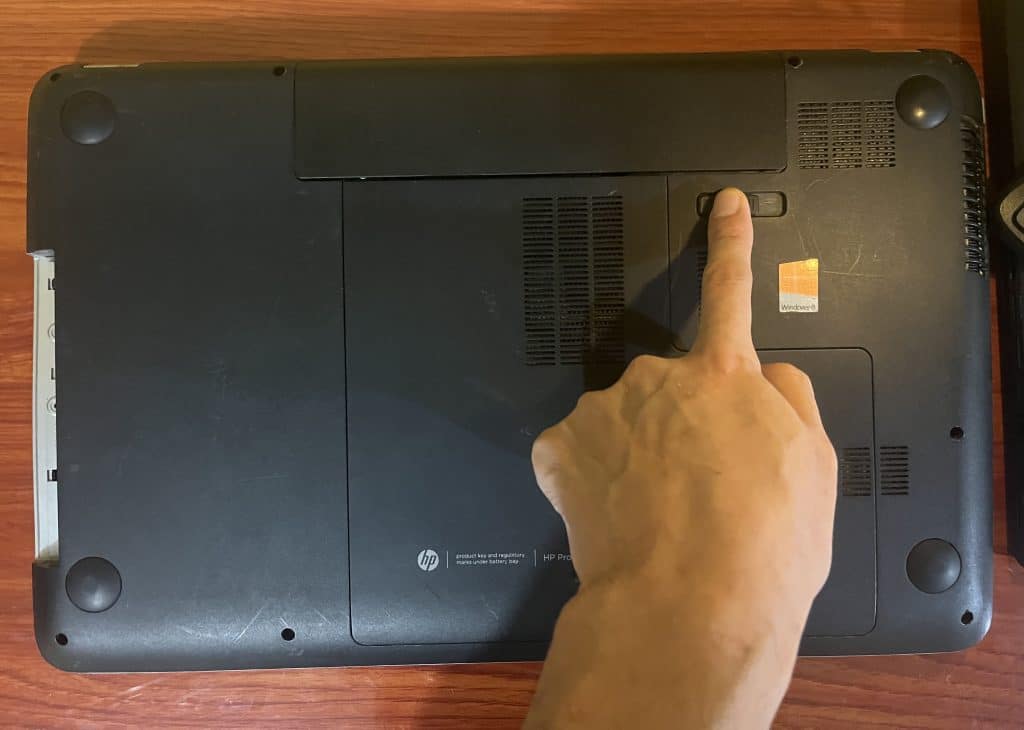
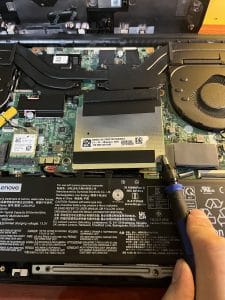
If your laptop looks somewhat like what’s shown below, it means the battery has to be removed first. Then all screws around it. (There’s no need to unscrew every single screw).
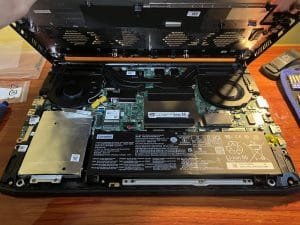
If your laptop does not have a compartment nor a removable battery, that means your job is just to remove every single screw on sight in any order.
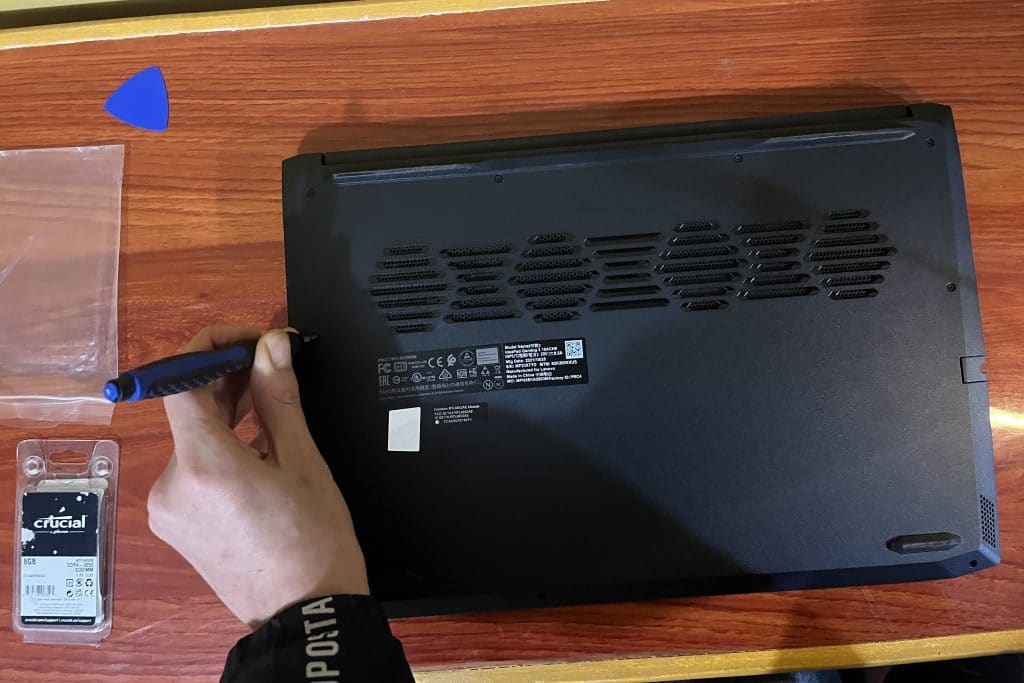
3. Use a PICK to remove the plastic cover
First you have to sort of “loosen up” the bottom panel. Do this by sticking the pick between the bottom panel cover and moving it all around it.
If you’re replacing RAM…
That’s it put the cover back in and turn on your laptop. There’s no need to do anything else, no control panel or BIOS set up shenanigans.
5. Bonus: Safely putting back the bottom panel
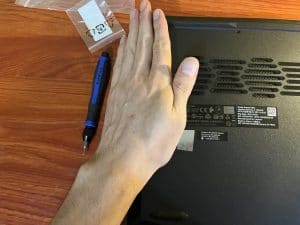
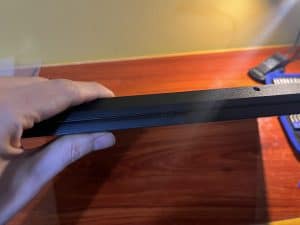
a) Start by placing the bottom panel from its upper side as shown below.
b) Secure the Bottom Panel using the palm of your hands and then just two fingers. You don’t need to be forceful, that’s the key.
Upgrading more stuff
I know the guide has been super long and if you did the upgrade, I’m sure you found out it was much simpler than what’s described here. I just wanted to make sure there are no screw ups for ANYBODY doing this and that’s why I was trying to be as detailed as possible.
Anyways, if you think you can do this. You can also try upgrading your storage for an extra 1000GB or 500GB more space.
If you DON’T have an SSD but an HDD instead, the addition of an SSD will make a HUUUUUGE difference in performance, most of the time , more so than additional RAM ever will.
Comments?
If you have any questions or suggestions please let me know in the comments below.
Author Profile
- I am physicist and electrical engineer. My knowledge in computer software and hardware stems for my years spent doing research in optics and photonics devices and running simulations through various programming languages. My goal was to work for the quantum computing research team at IBM but Im now working with Astrophysical Simulations through Python. Most of the science related posts are written by me, the rest have different authors but I edited the final versions to fit the site's format.